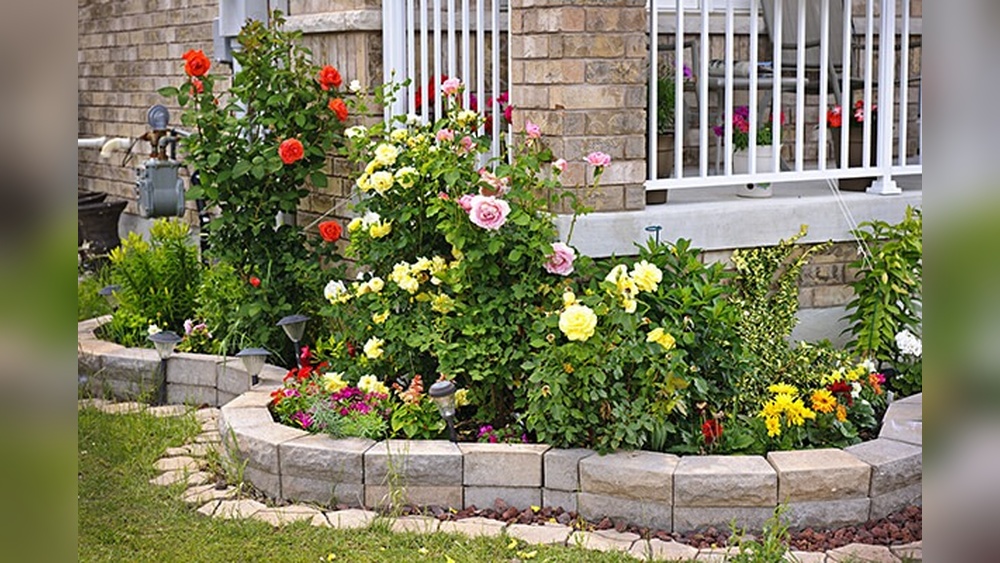
How To Install Stone Landscape Edging
Transforming your yard with stone landscape edging is one of the most rewarding and impactful ways to define outdoor spaces, enhance curb appeal, and simplify maintenance. Whether you’re hoping to separate a lush lawn from flower beds, contain mulch, or give structure to a winding path, stone edging offers both enduring beauty and rugged practicality. Unlike wood or plastic, stone delivers unmatched durability and a timeless aesthetic that complements nearly any garden style, from classic cottage borders to sleek, modern lines.
Despite its robust appearance, installing stone landscape edging is a project that’s accessible to most DIY enthusiasts, provided you plan carefully and use the right techniques. Understanding the step-by-step process, material choices, and professional tips can save you time, money, and frustration.
This comprehensive guide will walk you through everything you need to know, from selecting the perfect stones to mastering installation tricks that ensure lasting results, complete with real-world examples, comparison tables, and expert-backed advice.
Key Takeaways
- Stone landscape edging provides long-term durability, low maintenance, and strong visual impact compared to other edging materials.
- Proper planning, site preparation, and material selection are crucial for successful installation and long-lasting results.
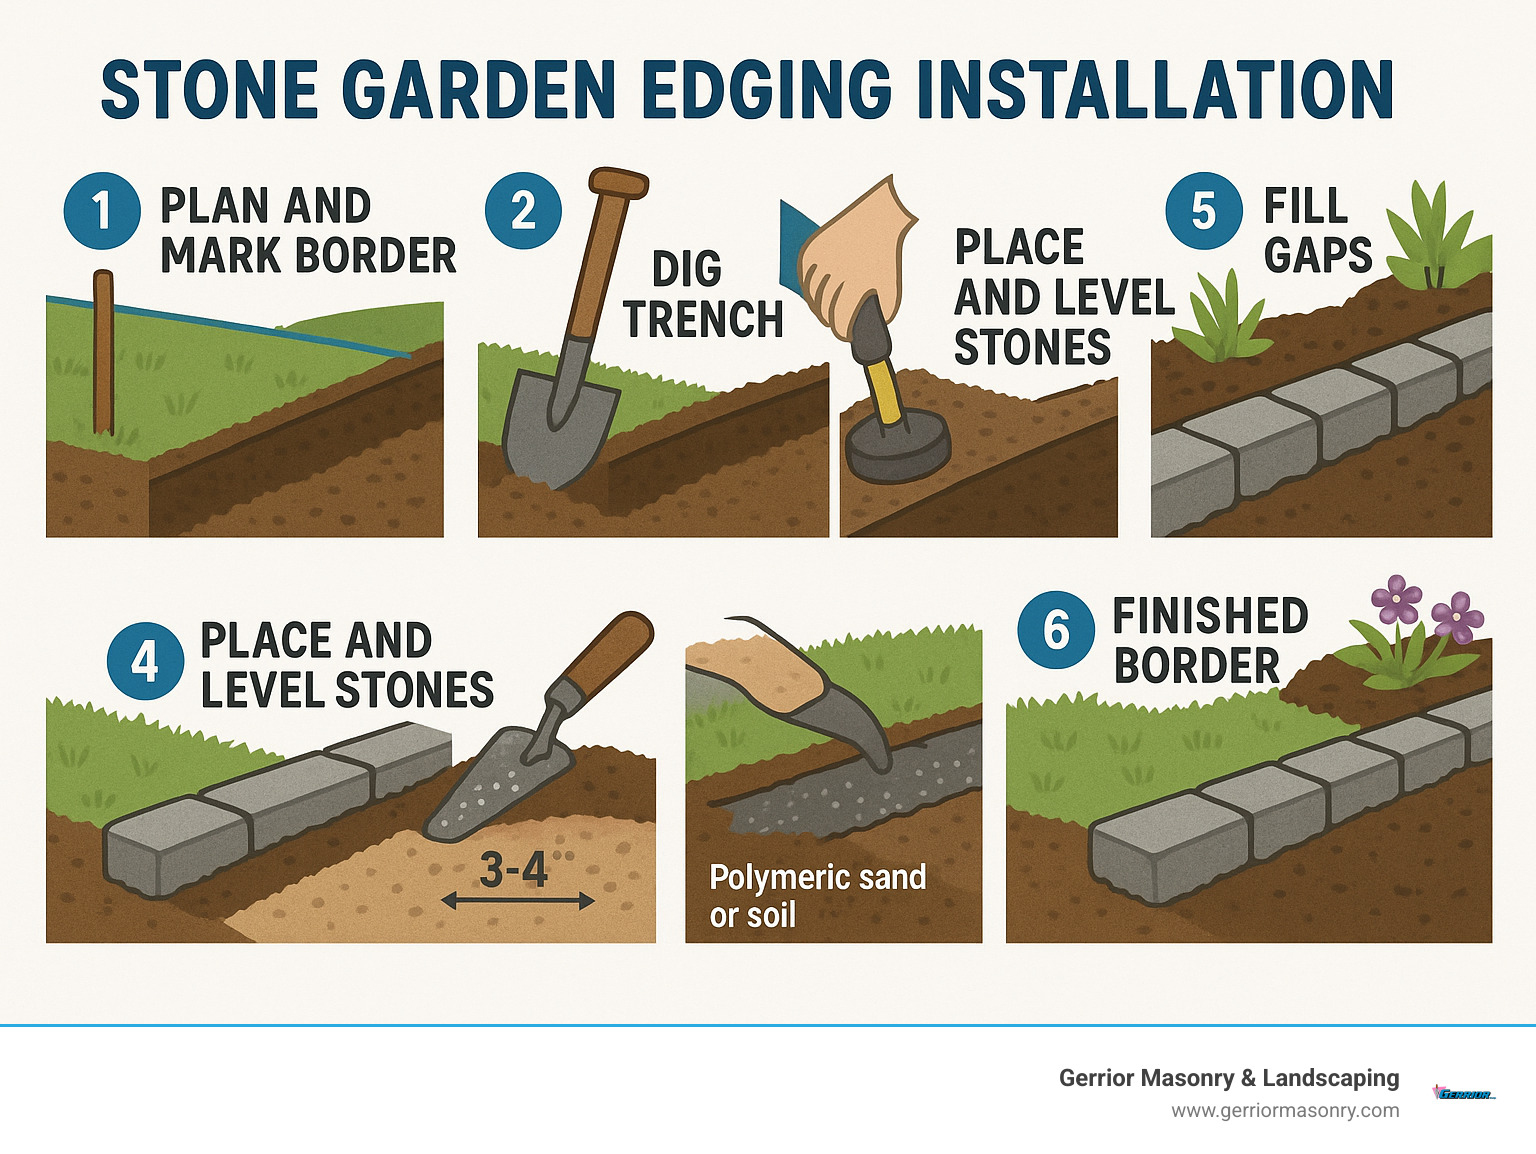
- The main installation steps include marking, digging, laying a base, placing stones, leveling, and finishing with backfill or joint material.
- DIY-friendly installation is achievable with standard garden tools, but heavy stone types may require extra help or equipment.
- Key cost, labor, and maintenance considerations differ between stone types and installation methods.
- Maintenance needs are minimal but periodic checks and minor repairs will keep your edging looking fresh for years.
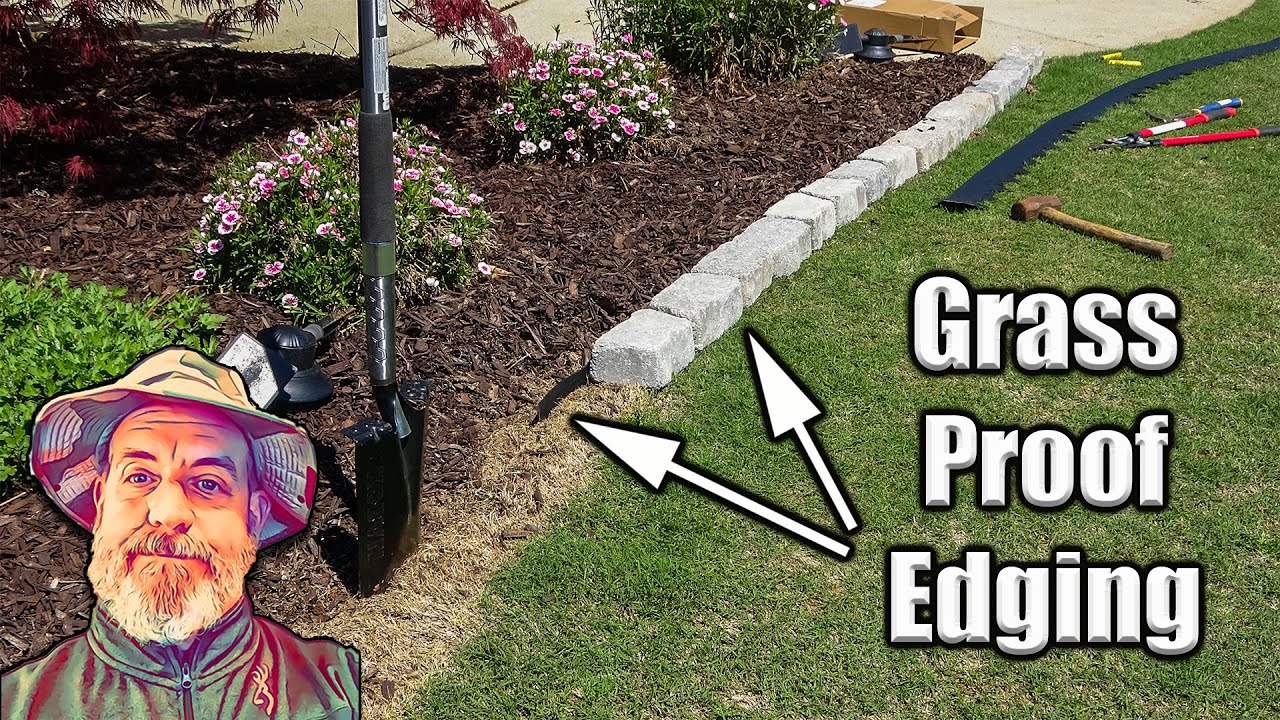
Credit: www.youtube.com
Understanding Stone Landscape Edging
Stone landscape edging serves both functional and aesthetic purposes. It creates a clear boundary between different areas in a yard, such as lawns, flower beds, walkways, and driveways. The right edging prevents grass or mulch from spilling into unwanted areas, reduces the need for frequent trimming, and makes mowing easier by providing a hard edge to work against.
Types Of Stone Edging
There are several popular types of stone edging, each with distinct characteristics:
- Natural stone: Includes flagstone, slate, granite, limestone, and fieldstone. Offers a rugged, organic look.
- Cut stone/pavers: Uniformly shaped stones, such as cobblestone or concrete pavers, create a clean, modern line.
- Stacked stone: Stones are stacked to form a low wall, useful for raised beds or sloping areas.
- Boulders/large stones: Used for dramatic, bold borders, often in informal or rustic landscapes.
Each type serves different design goals and installation methods, which will be detailed in later sections.
Advantages Of Stone Over Other Materials
When compared to wood, metal, or plastic, stone edging stands out for its:
- Longevity: Stone can last decades with minimal maintenance.
- Weather resistance: Unaffected by rot, pests, or UV rays.
- Aesthetic versatility: Complements a range of landscape styles.
- Eco-friendliness: Natural stone has a low environmental impact and blends seamlessly with the surroundings.
Common Applications
Stone edging is commonly used to:
- Separate lawns from garden beds.
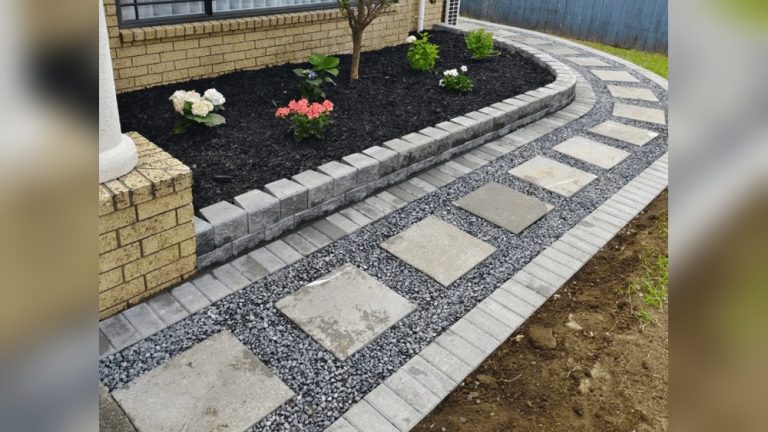
- Define paths or walkways.
- Retain soil or mulch in sloped areas.
- Enhance water features or patios.
- Frame trees or shrubs.
With these basics in mind, let’s explore how to plan and execute a successful stone edging project.
Credit: gerriormasonry.com
Planning Your Stone Edging Project
A well-planned project ensures efficient installation and a cohesive look that matches your landscape goals. Skipping this step often leads to wasted materials, uneven lines, and ongoing maintenance headaches.
Assessing Your Landscape
Begin by evaluating the areas you want to edge. Consider:
- Length and shape: Curves require more flexible stone types; straight lines suit rigid pavers.
- Soil conditions: Rocky or compacted soil may need extra preparation.
- Purpose: Containment, decoration, or both?
- Drainage: Avoid creating barriers that trap water near foundations.
Sketch a simple map of your yard, marking where edging will go. Measure total length to estimate material needs.
Choosing The Right Stone
Selecting the right stone is both a practical and aesthetic decision. Use the comparison table below to weigh your options:
| Stone Type | Durability | Appearance | Cost (per linear foot) | Best Use |
|---|---|---|---|---|
| Flagstone | High | Natural, irregular | $8, $15 | Organic, curved borders |
| Cobblestone | Very High | Uniform, classic | $10, $20 | Formal beds, paths |
| Fieldstone | High | Rustic, varied | $7, $12 | Informal gardens |
| Limestone | Medium-High | Light, textured | $6, $13 | Modern or cottage style |
| Concrete Pavers | Very High | Uniform, customizable | $5, $10 | Straight lines, easy install |
Price ranges are for reference and will vary by region and supplier.
Calculating Materials
To estimate your material needs:
- Measure the total linear feet of your planned border.
- Divide by the length of each stone to estimate the quantity required.
- Add 10% to account for cuts, waste, and breakage.
Don’t forget to budget for base materials (gravel and sand), landscape fabric, and any joint filler (such as polymeric sand or soil).
Gathering Tools And Supplies
A basic stone edging project requires:
- Shovel and spade
- Tape measure and marking spray/rope
- Wheelbarrow
- Level and rubber mallet
- Garden gloves and safety glasses
- Plate compactor or hand tamper
- Landscape fabric (optional)
- Gravel and sand for base
- Polymeric sand or soil for joints
Heavier projects may require a helper or small machinery for moving large stones.
Preparing The Site For Installation
Site preparation is the foundation for a professional-looking, long-lasting border. Rushing through this phase is a common source of future problems.
Marking The Edging Line
Use a garden hose or rope to lay out the desired edge shape. Once satisfied, mark the line with marking spray or powdered chalk. Double-check curves and widths for consistency.
Pro Tip: For tight curves, smaller stones or flexible stone types are easier to work with.
Excavating The Trench
Dig a trench along your marked line:
- Depth: For most stone edging, aim for a trench 4, 6 inches deep (enough for base material plus stone height).
- Width: The trench should be 2, 3 inches wider than your stones to allow for adjustment and backfill.
Remove all sod, roots, and debris to expose clean soil. Set aside the excavated soil for backfilling.
Adding A Stable Base
A compacted base prevents stones from shifting, sinking, or tilting over time.
- Spread 2, 3 inches of crushed gravel in the trench.
- Use a hand tamper or plate compactor to pack the gravel firmly.
- Add a 1-inch layer of leveling sand on top of the gravel for easier stone placement.
Pro Tip: In clay or poorly-drained soils, consider a deeper base for improved drainage.
Laying Landscape Fabric (optional)
Lining the trench with landscape fabric before adding gravel helps prevent weed growth through the edging. Cut the fabric to size and extend it slightly up the trench sides.

Credit: worldofstonesusa.com
Installing Stone Landscape Edging
With your site prepared, you’re ready for the most satisfying part: placing the stones and creating your border.
Setting The Stones
Begin at one end of the trench and work methodically:
- Set the first stone flush with the ground or slightly above, depending on the look you want.
- Use a level to ensure it’s even side-to-side and front-to-back.
- Adjust the sand base as needed to achieve a uniform height.
- Continue placing stones, leaving a small gap (about 1/2 inch) between each for flexibility and joint material.
For curved borders, stagger stone joints and use smaller stones for tighter turns.
Tapping And Leveling
After setting several stones, use a rubber mallet to tap them firmly into place. Check frequently with a level, especially for long runs. Uneven stones create tripping hazards and look sloppy.
Pro Tip: Place a straight 2×4 board across multiple stones to check for consistent height.
Backfilling And Securing
Backfill soil or gravel along both sides of the stones to lock them in place. For raised or stacked stone edging, backfill in layers and tamp down each layer to prevent settling.
If using stacked stones, offset joints between layers for added strength.
Filling The Joints
The final step is filling the gaps between stones:
- For a natural look, sweep soil or mulch into the joints and plant creeping ground cover.
- For a permanent bond, use polymeric sand. Sweep into joints, then mist lightly with water to set.
Avoid using plain sand, which can wash away in heavy rains.
Example: Installing A Curved Flagstone Border
A homeowner in Pennsylvania wanted a natural-looking edge for a curved flower bed. They chose locally sourced flagstone and followed these steps:
- Marked the curve with a garden hose.
- Dug a 5-inch-deep trench and added a gravel base.
- Used irregular-shaped flagstones, fitting them like a puzzle.
- Filled joints with a mix of soil and creeping thyme for a soft, blended look.
The result was a robust, maintenance-free border that withstood harsh winters and heavy foot traffic.
Comparing Stone Edging Methods
Understanding the differences between installation methods can help you choose the best approach for your yard, climate, and maintenance expectations.
Dry Laid Vs. Mortared Stone Edging
| Method | Durability | Installation Difficulty | Flexibility | Repair/Maintenance |
|---|---|---|---|---|
| Dry Laid | High (with proper base) | Moderate (DIY-friendly) | Adjustable, good for curves | Easy to repair, replace stones |
| Mortared | Very High | Challenging (may need pro) | Rigid, best for straight lines | Repairs require chipping mortar |
Dry laid edging is most popular for DIYers due to its flexibility and ease of repair. Mortared stone suits formal gardens or areas with heavy traffic.
Cost Comparison With Other Materials
To help budget your project, here’s how stone compares to other common edging options:
| Material | Average Cost per Linear Foot | Expected Lifespan | Maintenance Needs |
|---|---|---|---|
| Natural Stone | $7, $20 | 30+ years | Very Low |
| Concrete Paver | $5, $10 | 25+ years | Low |
| Wood | $3, $7 | 5, 10 years | High (rot, pests) |
| Plastic/Metal | $2, $8 | 10, 15 years | Medium (can crack, shift) |
While stone costs more upfront, its long lifespan and minimal maintenance often make it a more economical choice over decades.
Example: Comparing Flagstone And Cobblestone
In my experience, flagstone is easier to install along curves but requires more patience in fitting irregular shapes. Cobblestone, while heavier and pricier, delivers unmatched uniformity and is ideal for straight, formal borders. Both options outperformed wood in longevity and appearance over a 10-year period in a Northeast climate.
Maintenance And Long-term Care
One of the main attractions of stone landscape edging is its low maintenance requirements. However, a few periodic tasks will maximize its beauty and function.
Inspecting For Shifting Or Settling
Over time, freeze-thaw cycles and heavy rain can cause stones to shift or settle, especially if the base wasn’t compacted properly. Walk the length of your edging every spring and fall to check for:
- Raised or sunken stones
- Wide gaps or joint washout
- Weeds growing in joints
Prompt repairs prevent bigger issues later.
Cleaning And Weed Control
Sweep dirt and debris off the stones as needed. For stubborn stains, a solution of water and mild detergent applied with a scrub brush is usually sufficient. Avoid harsh chemicals that can damage stone or leach into garden beds.
For weed control:
- Pull weeds by hand or use a vinegar-based spray for organic gardens.
- Top up polymeric sand or joint filler every few years to deter weed growth.
Repairing Damaged Edging
If a stone cracks or shifts:
- Remove the affected stone and any loose base material.
- Re-level the area with sand or gravel.
- Replace the stone and backfill as before.
Dry-laid edging is especially forgiving for quick repairs.
Seasonal Tips
- In areas with snow removal, mark the edge clearly to avoid damage from shovels or plows.
- After winter, check for frost heave and reset stones as needed.
Pro Tip: If you plan to edge around trees, allow a gap between the stones and trunk to accommodate root growth and avoid damaging the tree.
Real-world Examples And Case Studies
Learning from others’ experiences can help you anticipate challenges and visualize your own project’s outcome.
Case Study 1: Formal Cobblestone Border For A Driveway
A homeowner in Ohio installed a cobblestone border along their asphalt driveway to prevent crumbling and add curb appeal. They chose mortared installation for maximum durability and a crisp, straight line. After two winters with heavy snow and plowing, the edging remained intact, requiring only a quick sweep each spring.
Case Study 2: Raised Stacked Stone Bed In A Sloped Garden
A sloped backyard in Oregon required more than just a simple border. The owners built a two-tier stacked fieldstone wall, about 12 inches high, to create a level planting area. They used gravel and landscape fabric for drainage behind the wall and backfilled with rich soil. The bed has prevented soil erosion and added structure to a previously unusable space.
Case Study 3: Diy Natural Stone Pathway Edging
A garden enthusiast in Georgia wanted to edge a winding flagstone path with matching stones. Using the dry-laid method, they completed 60 feet of edging over two weekends. The path has remained stable for five years, with only minor joint touch-ups after heavy rains.
These examples highlight the versatility of stone edging for different climates, terrains, and design goals.
Enhancing The Look Of Stone Edging
While stone edging is attractive on its own, thoughtful finishing touches can elevate your landscape design.
Incorporating Plantings
Softening the hard edge of stone with low-growing plants creates a seamless transition between bed and lawn. Consider:
- Creeping thyme or sedum in joints
- Ornamental grasses behind taller edging
- Spring bulbs for seasonal color
Choose plants suited to your climate and sunlight conditions for best results.
Lighting For Drama And Safety
Adding low-voltage landscape lighting along stone borders highlights curves and textures at night while improving safety. Solar-powered stake lights are an easy, no-wiring option for DIYers.
Matching Materials
Coordinate stone edging with other hardscape features, such as patios, retaining walls, or water features, for a cohesive look. Using similar materials or colors helps unify the landscape.
Example: Blending Stone Edging With A Modern Patio
A homeowner paired clean, gray limestone edging with a matching paver patio. The consistent material palette tied the space together and created a contemporary, organized appearance.
Troubleshooting Common Installation Problems
Even with careful planning, a few issues can arise during or after installation. Being prepared to troubleshoot will ensure lasting satisfaction.
Stones Not Leveling Evenly
If stones wobble or don’t sit flush:
- Check that the base is compacted and level. Add or remove sand as needed.
- Use a longer level or straight board to check across several stones.
Gaps Too Wide Or Narrow
Irregular stones can create inconsistent gaps:
- Rearrange stones for best fit before final placement.
- Use stone chips or cut larger stones for tight joints.
Pro Tip: A brick chisel and hammer can shape stones for a better fit, but wear safety glasses and gloves.
Weeds Or Grass Invading The Border
If weeds or grass creep into your stone edging:
- Install landscape fabric beneath the base layer.
- Maintain a clean, mulched edge on the garden side.
- Pull weeds promptly before they establish deep roots.
Stones Shifting After Heavy Rain
Poor drainage or an inadequate base can cause stones to move:
- Re-excavate and add more gravel for drainage.
- Consider a deeper trench or a slight outward slope to direct water away from the edging.
Example: Resetting Stones After Frost Heave
A Vermont gardener noticed several stones had lifted after a harsh winter. They removed the affected stones, deepened the base with extra gravel, and reset them in spring. The problem didn’t recur, highlighting the importance of site-specific preparation.
Frequently Asked Questions
What Is The Best Stone For Landscape Edging In Areas With Harsh Winters?
Granite or dense cobblestone are excellent choices for cold climates due to their resistance to freeze-thaw cycles. Both materials are unlikely to crack or shift with temperature fluctuations. Proper base preparation with deep gravel is also crucial in these regions.
Can I Install Stone Edging On A Steep Slope?
Yes, but you’ll need to use a stacked stone wall technique rather than a single row of stones. The stones should be set into the slope, and each layer backfilled and compacted to prevent movement. For slopes steeper than 2:1, consult a landscape professional for safety and stability.
How Do I Cut Or Shape Stones For A Custom Fit?
To cut natural stone:
- Score the stone with a masonry chisel and hammer along the desired line.
- Tap gently until the stone splits.
- For harder stones, use a stone saw with a diamond blade.
Always wear eye protection and gloves. Rental centers often have the right saws if you don’t own one.
What Should I Do If My Stones Are Sinking Into The Soil Over Time?
Sinking is usually caused by an inadequate or poorly compacted base. Remove the affected stones, deepen the trench, and add more compacted crushed gravel before replacing the stones. This distributes weight and prevents future settling.
Are There Eco-friendly Options For Stone Edging?
Yes. Using locally sourced or reclaimed stone reduces environmental impact. You can also look for stones certified by the Natural Stone Council’s sustainability standards (Natural Stone Council). Avoid imported stone with a high carbon footprint when possible.
Resources For Further Learning
For additional step-by-step visuals, installation calculators, and design inspiration, visit the This Old House guide or consult with your local extension service for region-specific advice.
Transforming your landscape with stone edging is a highly rewarding DIY project that delivers lasting value, beauty, and structure. Whether you opt for classic cobblestone, rustic fieldstone, or sleek limestone, following best practices for planning, preparation, and installation will ensure your border stands the test of time.
With minimal maintenance, your stone edging will continue to define and beautify your outdoor spaces for decades to come.