Can Hay Be a Living Mulch for Vegetable Gardens? Yes, Here’s How
Can hay be a living mulch for vegetable gardens? Yes, it can, and using hay as a living mulch offers unique benefits for soil health and weed suppression. This guide explains how to turn ordinary hay into a dynamic living mulch system that feeds your vegetables naturally.
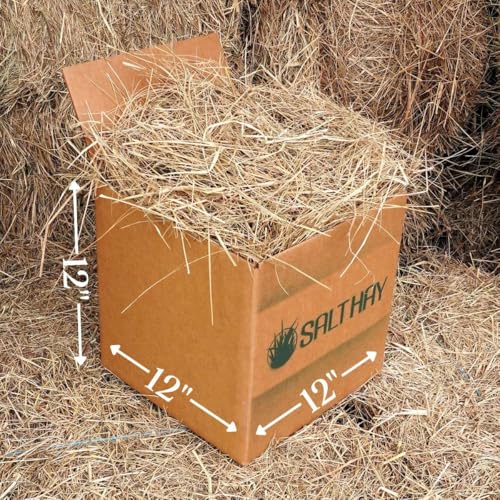
Salt Hay
Organic Salt Hay Mulch for Vegetable Gardens…
- OMRI (Organic Materials Review Institute) Listed: OMRI listed means that a product is safe to use in organic production, processin…
- PREMIUM SALT HAY MULCH: Clean and free from weed seeds and other garden waste that is commonly hidden in hardwood mulch. Salt Hay…
- LIGHTWEIGHT & EASY TO SPREAD: Unlike traditional mulch, Salt Hay is incredibly light and easy to spread, while still performing at…
As an Amazon Associate I earn from qualifying purchases.
Simply put, hay can be used as a living mulch when you select varieties that re-sprout after cutting, creating a self-renewing ground cover that suppresses weeds, retains moisture, and adds organic matter as it decomposes. It works best in no-till and low-maintenance gardens.
Key Takeaways
- Hay as a living mulch means using forage grasses or legumes that regrow after being cut, forming a protective layer around vegetables.
- Choose the right hay type – oat, barley, or clover hay work best because they re-sprout readily and fix nitrogen.
- Apply hay at the right time – after vegetable seedlings are established, to avoid competition.
- Living mulch from hay reduces watering needs by up to 50% and builds soil structure over time.
- Manage height and thickness to prevent the mulch from shading your vegetables or hosting pests.

What Is a Living Mulch and How Does Hay Fit In?
A living mulch is a ground cover of living plants grown alongside your main crops. Unlike plastic or wood chip mulches, living mulches stay alive, continue growing, and actively improve the soil. Hay fits into this category when you choose types that can regrow after cutting and spreading.
Traditional hay is cut and dried for animal feed, but if you cut it before it fully cures, the stems and seeds remain viable. When spread on garden beds, those seeds germinate and create a low-growing cover. This living cover protects the soil from erosion, cools the root zone, and feeds beneficial insects.
The key difference between hay and straw mulches: straw is dead and won’t regrow, while some hay types (especially grass hay with seed heads) can act as a living mulch. According to the Rodale Institute, living mulches can reduce soil erosion by 90% and increase water infiltration by 60%.
How Hay Works as a Living Mulch
- Seed viability – Hay cut before full maturity retains seeds that sprout after spreading.
- Root systems – Growing hay roots aerate the soil and create channels for water.
- Decomposition cycle – As older layers die, they add organic matter while new shoots keep the cover active.
- Nitrogen contribution – Legume hays (alfalfa, clover) fix atmospheric nitrogen for vegetables.
- Microbial habitat – The living mat supports fungi, bacteria, and earthworms.
Tip: Use oat or barley hay for a fast-growing living mulch that dies back after a few weeks, avoiding long-term competition.
How to Use Hay as a Living Mulch in Vegetable Gardens
Using hay as a living mulch requires a slightly different approach than spreading dead straw. You want the hay to stay alive but controlled. Start by choosing a hay variety that suits your climate and vegetable types.
Oat hay is ideal for warm-season gardens because it sprouts quickly and dies after a few weeks. Clover hay works well for cool-season crops.
Follow these steps for a successful living mulch system:
- Prepare the bed – Remove existing weeds and lightly rake the soil surface.
- Plant vegetables first – Transplant seedlings or direct-sow seeds, allowing them to establish for 2-3 weeks.
- Spread the hay – Lay a 2-4 inch layer of hay around the vegetable plants, keeping hay 2 inches away from stems.
- Water thoroughly – The hay needs moisture to re-sprout. Water the entire bed well.
- Monitor regrowth – Within 5-10 days, green shoots will appear. If the hay grows taller than 6 inches, mow or trim it back.
- Renew the mulch – After the first flush dies, add another thin layer of fresh hay to keep the cycle going.
For best results, avoid using hay treated with herbicides like aminopyralid. These chemicals can persist and kill your vegetables. Always source hay from organic or trusted growers.
Important: Test a small area first. Some hay types contain weed seeds that may become invasive. Monitor for two weeks before full application.
Benefits of Using Hay as a Living Mulch
Using hay as a living mulch offers advantages that dead mulches cannot. The living plants actively benefit the soil and surrounding crops. Here are the main benefits supported by research and gardener experience:
| Benefit | How Hay Mulch Delivers |
|---|---|
| Weed suppression | Living hay shades the soil, blocking weed germination. Re-sprouting hay outcompetes most annual weeds. |
| Moisture retention | The living mat reduces evaporation by 30-50%, according to University of California Extension. |
| Soil cooling | Roots and shoots keep soil temperatures 5-10°F cooler in summer. |
| Nutrient cycling | Legume hays add nitrogen; grass hays add carbon. Microbial activity increases. |
| Habitat for beneficials | Ground beetles, spiders, and pollinators find shelter in the living layer. |
This living mulch approach also sequesters carbon. A study by the USDA Agricultural Research Service found that living mulches can store up to 0.5 tons of carbon per acre annually.
Tip: For maximum nitrogen, use alfalfa hay. It fixes 150-200 pounds of nitrogen per acre per season.
Potential Drawbacks and How to Avoid Them
While hay as a living mulch has many benefits, it also comes with risks. The biggest concern is competition for water and nutrients. If the hay grows too vigorously, it can outcompete your vegetables.
Another issue is pest attraction – slugs and snails love damp hay.
Here are the main drawbacks and how to manage each one:
- Competition – Manage by mowing or trimming the hay to 3-4 inches tall every 2-3 weeks.
- Weed seeds – Use certified seed-free hay or hay from first cutting to minimize weed introduction.
- Slugs and snails – Apply diatomaceous earth around vegetables or use beer traps.
- Fire hazard – Hay is combustible; keep it moist and away from heat sources.
- Nutrient tie-up – Grass hay can temporarily tie up nitrogen; add a side dressing of compost or fish emulsion.
Warning: Never use hay treated with persistent herbicides like picloram. These chemicals can damage vegetables for several years.
Types of Hay Suitable for Living Mulch
Not every type of hay works as a living mulch. The best choices are those with high seed viability and low weed content. Here’s a comparison of common options:
| Hay Type | Regrowth Speed | Nitrogen Contribution | Best For |
|---|---|---|---|
| Oat hay | Fast (5-7 days) | Low | Warm-season veggies, temporary cover |
| Barley hay | Fast | Low | Summer gardens, suppresses weeds |
| Alfalfa hay | Moderate (10-14 days) | High (nitrogen fixer) | Leafy greens, heavy feeders |
| Clover hay | Slow (14-21 days) | High | Cool-season gardens, long-term cover |
| Timothy hay | Slow | Low | Perennial beds, low-maintenance |
Choose oat or barley hay if you want a quick cover that dies back naturally. Use alfalfa or clover hay if your vegetables need extra nitrogen. Avoid timothy hay for annual vegetables – it grows too slowly and can become weedy.
Step-by-Step Guide to Applying Hay Living Mulch
Applying hay as a living mulch correctly ensures you get the benefits without harming your vegetables. Follow this detailed process:
- Source high-quality hay – Buy from a reputable supplier. Ask if it was cut before full seed set to ensure viability.
- Condition the hay – Fluff the hay to break up clumps. Remove any large sticks or debris.
- Water your vegetable bed – Moist soil helps the hay start re-sprouting immediately.
- Apply in a thin layer – 2-3 inches is ideal. Thicker layers can smother vegetables and encourage rot.
- Water again – Keep the hay damp for the first week to trigger seed germination.
- Monitor after 10 days – If green shoots appear, you have a living mulch. If not, lightly rake to expose seeds to soil.
- Mow if needed – When the hay grows taller than 6 inches, use a string trimmer or mower to keep it at 3-4 inches.
- Replenish – After 4-6 weeks, the original hay may start to die. Add a fresh thin layer to maintain cover.
Tip: For no-till gardens, lay cardboard under the hay to block existing weeds. The cardboard decomposes within a season.
Common Mistakes When Using Hay as a Living Mulch
Even experienced gardeners make errors with hay as a living mulch. Avoid these pitfalls for the best results:
- Using hay that contains herbicide residues – This is the number one killer of vegetable gardens. Always test a small area first.
- Applying too thick a layer – Over 4 inches prevents air circulation and encourages fungal diseases.
- Ignoring competition – Hay that grows too tall shades vegetables. Mow regularly.
- Failing to water adequately – Dry hay will not re-sprout. Keep it damp for the first two weeks.
- Using hay with too many weed seeds – First-cutting hay generally has fewer weed seeds. Avoid hay from weedy fields.
- Applying near vegetable stems – Leave a 2-inch clear zone to prevent stem rot and slug damage.
Warning: If your vegetables start yellowing after applying hay mulch, test the hay for herbicide carryover. Remove contaminated hay immediately.
Tips for Maximizing Hay Mulch Effectiveness
To get the most out of your hay as a living mulch, combine it with other sustainable practices. Here are expert tips:
- Pair with drip irrigation – Run drip lines under the hay to deliver water directly to vegetable roots while the mulch stays moist.
- Add a nitrogen source – If using grass hay, apply a fish emulsion or compost tea every 3-4 weeks to balance carbon.
- Use in paths – Hay living mulch works great in walkways between raised beds, where foot traffic keeps it low.
- Rotate hay types – Alternate between grass and legume hays each season to build soil structure and fertility.
- Combine with biochar – Sprinkle biochar under the hay to enhance microbial activity and nutrient retention.
- Introduce beneficial insects – Plant flowers like alyssum around the garden to attract predators that control pests in the hay.
A study by the University of Vermont Extension found that gardens using living hay mulches produced 15-20% higher yields of tomatoes and peppers compared to bare soil, after adjusting for competition.

Frequently Asked Questions
Can hay be used as a living mulch for all vegetables?
It works best for large, established vegetables like tomatoes, peppers, squash, and brassicas. Small seedlings may be outcompeted if the hay sprouts too quickly. For delicate crops, wait until they are at least 6 inches tall before applying.
How long does hay living mulch last?
Depending on the type, a single application can remain active for 4-8 weeks. Oat hay dies after about 3 weeks, while clover hay can last 8-10 weeks. You can extend the life by adding fresh layers every month.
Does hay living mulch attract pests?
It can attract slugs, snails, and earwigs, especially in damp conditions. Regular mowing and encouraging natural predators like ground beetles helps. You can also use copper tape barriers around vegetable stems.
Is straw better than hay for living mulch?
Straw is dead and will not re-sprout, so it cannot be a living mulch. Hay has viable seeds and can regrow. For a true living mulch, hay is the only option.
For a non-living deep mulch, straw is safer because it won’t compete.
Can I use hay from my own field?
Yes, if you can confirm it is free of herbicides and has viable seeds. Cut the hay before full seed maturity (early flowering stage) for best regrowth. Test a small patch in a container first.
Final Thoughts
Hay as a living mulch is a powerful tool for gardeners who want to reduce watering, suppress weeds, and build soil health naturally. The key is choosing the right hay type, applying it at the correct thickness, and managing growth with regular mowing. Start with a small test bed this season, and you’ll see how this ancient practice can transform your vegetable garden into a self-sustaining ecosystem.
Related pick: Check today's price on Amazon