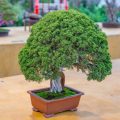
Bonsai trees grown from seed offer a unique journey. You control the entire process. This starts from the very beginning. It requires understanding seed needs. It also means learning how to nurture a young plant. Patience is key to success.
The Magic of Starting Bonsai From Seed
Many people think bonsai are old trees. They are often bought that way. But you can start your own bonsai story.
You can do this from a seed. Growing bonsai from seed is a special path. It is a path of deep connection to nature.
You watch your little tree grow each day. You see it change and develop. This connection is what makes bonsai so rewarding.
Why start from seed? It offers total control. You choose the species.
You guide its early growth. You learn its unique traits. This is different from buying a pre-started tree.
With a pre-started tree, someone else did the early work. Starting from seed is a longer journey. But it is a richer one for many.
You get to see every stage of its life. From a speck of a seed to a miniature tree. This process teaches you a lot.
You learn about patience. You learn about plant cycles. You learn how to adapt.
You learn how to respond to your tree’s needs. This is the essence of bonsai cultivation.
This method also allows for true artistry. You can begin training very early. You can guide the trunk shape.
You can influence branch placement. It’s like sculpting with a living thing. This level of control is not possible when you buy an older tree.
Understanding Bonsai Seeds: What You Need to Know
Not all tree seeds are suitable for bonsai. Some grow too fast. Others have large leaves.
You want seeds from species that naturally stay small. Or ones that tolerate pruning well. Good choices include Japanese maple, pine, juniper, and elm.
These are common in the bonsai world.
Seeds need specific conditions to sprout. Many tree seeds need a cold period. This is called stratification.
It mimics winter. It tells the seed it is time to grow. Some need to be soaked in water first.
Others might need scarification. This means scratching their outer coat. This helps water get in.
Research your chosen species. Learn its seed requirements. This is a critical first step.
Without the right prep, seeds will not sprout. You will be left with disappointment. And a lot of waiting.
Understanding these needs is crucial for success.
Where do you get bonsai seeds? Reputable online suppliers are a good source. Look for sellers who specialize in bonsai seeds.
You can also collect seeds from local trees. But be sure you identify them correctly. And know their needs.
Collecting your own can be very rewarding.
Consider the climate where you live. Some seeds are easier to grow in certain regions. A seed that loves heat might struggle in a cold place.
Match the seed to your environment. This gives it the best chance. It makes your job much easier.
Preparing Your Bonsai Seeds for Germination
This is where the real work begins. It’s about mimicking nature. You want to trick the seed into thinking it’s spring.
Most tree seeds need stratification. This is a cold, moist period. It usually lasts from 30 to 90 days.
Some seeds need even longer.
To stratify, mix your seeds with a damp medium. Peat moss or vermiculite works well. Put this mix in a plastic bag.
Label it with the seed type and date. Place the bag in your refrigerator. Not the freezer.
Check it now and then. Keep the medium moist. If it dries out, the process fails.
Some seeds need soaking. This is often for species with hard coats. Soak them in room-temperature water for 24 hours.
This softens the coat. It helps water penetrate. This is a simple step.
But it can make a big difference.
Scarification is another method. It’s for seeds with very tough outer shells. You can gently nick the seed coat with a file.
Or use sandpaper. Be careful not to damage the embryo inside. Only do this if research shows it’s needed for your seed type.
Once stratification or soaking is done, it’s time to plant. You’ll need a good seed-starting mix. It should be well-draining.
You can buy this. Or make your own. A mix of peat moss, perlite, and sand is good.
Use small pots or seed trays. They should have drainage holes. Fill them with your mix.
Moisten the soil. Plant the seeds at the correct depth. This is usually about twice the seed’s diameter.
Do not plant them too deep. They will struggle to reach the surface.
Cover the seeds gently. You can use a thin layer of the soil mix. Or some fine gravel.
This helps retain moisture. It also prevents damping off. This is a fungal disease that can kill seedlings.
Seed Starting Essentials
Seed Type: Choose species suited for bonsai.
Stratification: Cold, moist period for many seeds.
Soaking: Softens hard seed coats.
Scarification: Helps water penetrate tough shells.
Soil Mix: Well-draining, airy.
Containers: Pots or trays with drainage.
Germination: The First Signs of Life
After planting, patience is your best friend. Germination times vary greatly. Some seeds sprout in a week.
Others can take months. Or even a year or two. Do not give up too soon.
Keep the soil consistently moist. But not waterlogged. A misting bottle is ideal for this.
Keep the pots in a warm place. Around 70-75°F (21-24°C) is usually good. A heat mat can help.
Place the pots on top of it. This provides gentle warmth from below. This encourages germination.
Once you see sprouts, congratulations! You have successfully germinated seeds. This is a major milestone.
Your tiny seedlings need light now. They need a lot of it. But not direct, harsh sun.
Place them in a bright location. A sunny windowsill is good. Or use grow lights.
Keep the grow lights a few inches above the seedlings. Adjust their height as the plants grow. This prevents them from getting leggy.
Leggy seedlings are weak. They stretch towards the light. This makes for a poor bonsai trunk later.
Continue to mist the soil. Keep it moist. Avoid letting it dry out.
Also, start to give them a little air circulation. A small fan on low speed can help. This strengthens their stems.
It also helps prevent fungal diseases.
Your seedlings are very delicate now. Treat them with care. Avoid touching them if possible.
They are easy to damage. They are at their most vulnerable stage.
What if nothing sprouts? Double-check your seed prep. Did you stratify correctly?
Was the soil kept moist? Sometimes, seeds are just not viable. This happens.
It’s a part of the process. Don’t be discouraged. Try again with a new batch.
Quick Seedling Care Tips
Light: Bright, indirect light or grow lights.
Water: Keep soil consistently moist, not wet. Mist gently.
Temperature: Warm, stable environment (70-75°F).
Airflow: Gentle circulation to strengthen stems.
Patience: Germination times vary widely.
First Transplanting: Giving Them Space to Grow
When your seedlings develop their first set of true leaves, they are ready for a transplant. True leaves are the ones that look like the mature plant’s leaves. Not the initial seed leaves.
This usually happens a few weeks after germination.
This first transplant is important. It gives their roots more space. It allows them to grow stronger.
Use slightly larger pots. Again, ensure they have good drainage. The soil mix can be the same.
Or you can add a little more organic matter.
Gently remove the seedling from its original container. Use a small tool, like a pencil or chopstick. Work around the roots.
Try not to disturb them too much. If the roots are tangled, be very gentle. Do not force them apart.
Place the seedling in its new pot. Plant it at the same depth as before. Or slightly deeper if the stem is leggy.
Fill the pot with soil. Water gently. Settle the soil around the roots.
Keep the newly transplanted seedlings in a shaded spot for a few days. This helps them recover from the shock. Then, gradually move them back to brighter light.
Continue with the same watering and airflow practices.
This is a good time to start thinking about future bonsai training. But do not start heavy pruning yet. The main goal now is healthy root and shoot growth.
Let the young tree establish itself.
Some growers like to put multiple seedlings in one larger pot. This is called growing them in a ‘nursery bed’. It saves space.
It also allows roots to intertwine a bit. This can encourage thicker trunks later. But individual pots give you more control over each plant.
If you are growing many seeds, this is the stage to thin them. Look for the strongest ones. Remove the weaker ones.
You want to give the best seedlings the most resources. This means more light, water, and nutrients.
Transplanting Checklist
Timing: After first set of true leaves appear.
Pots: Slightly larger, with drainage.
Soil: Well-draining, nutrient-rich.
Handling: Gently, to minimize root disturbance.
Aftercare: Shade for a few days, then gradually increase light.
Nurturing Young Trees: The First Few Years
The next few years are crucial. This is when you build the foundation for your bonsai. You are not shaping it much yet.
You are letting it grow freely. This is called the ‘growing out’ phase. The goal is healthy growth.
You want a strong trunk and good roots.
Watering is still key. Let the soil dry out slightly between waterings. But never let it become bone dry.
Overwatering can lead to root rot. Underwatering can stress the young tree. Feel the soil.
It’s the best way to know.
Fertilizing becomes important now. Young trees need nutrients. Use a balanced liquid fertilizer.
Dilute it. Feed them during the growing season. That is spring and summer.
Stop fertilizing in fall and winter.
Consider feeding them more often but with a weaker solution. This is often better than infrequent strong doses. It provides a steady supply of food.
It’s less likely to burn the roots.
Pruning in these early years is minimal. You might pinch back new shoots. This encourages branching.
It helps create a denser form. But avoid heavy pruning. You need to let the trunk thicken.
This is vital for a mature bonsai look.
You can start wiring very young trees. But do it gently. The branches and trunk are soft.
Use light gauge wire. Check it often. Remove it before it bites into the bark.
This can leave scars.
I remember my first pine seedling. It was so small. I was terrified of doing anything wrong.
I kept it in a tiny pot for almost two years. Just watered and fed it. I watched the needles grow.
It felt like slow progress. But that patience paid off. The trunk got thicker.
The branches started to set.
The key is to let the tree grow. Let it get a bit wild. This builds its energy.
It builds its structure. Don’t try to make it look like a bonsai too soon. That will stunt its growth.
And you will miss out on a strong foundation.
Think about repotting every year or two. This refreshes the soil. It allows you to inspect the roots.
You can trim back any circling roots. This keeps the root system healthy and compact. Use a slightly larger pot each time.
Or a bonsai training pot.
Sunlight is still very important. Make sure your tree is getting enough. The more light, the more vigorous the growth.
This is especially true for conifers like pines and junipers. Deciduous trees also love sun. But some might appreciate a little afternoon shade in very hot climates.
Wiring and Shaping: Guiding Your Bonsai’s Form
Once your tree has a trunk of decent thickness, you can start more serious styling. This usually takes 3-5 years from seed. For some species, it might be sooner.
For others, longer.
Wiring is a technique. It bends branches and the trunk into desired shapes. Use anodized aluminum or annealed copper wire.
Choose a gauge that is strong enough to hold the shape. But not so thick that it’s hard to bend.
Wrap the wire around the branch or trunk. Start at the base. Angle it about 45 degrees.
Wrap it smoothly. Do not overlap wires. This can damage the bark.
Once wired, gently bend the branch or trunk into position. Make slow, controlled movements. If it feels like it might snap, stop.
You can re-wire it later. Or try a different angle.
Check the wire regularly. Especially during the growing season. The tree grows.
The wire can start to cut into the bark. This leaves scars. Remove the wire before this happens.
Usually, it stays on for 3-6 months. But this varies by species and growth rate.
Pruning is also vital. Pruning shapes the tree. It encourages ramification.
Ramification is the development of fine branches. This creates a dense, mature look.
You will prune to define the main branches. You will prune to create pads of foliage. You will prune to remove unwanted growth.
Like branches growing straight up or down. Or crossing branches.
Use sharp bonsai tools. Clean cuts heal faster. Make cuts just above a bud.
This encourages new growth in that direction.
There are different pruning styles. Pinching is for soft new growth. Cutting is for woody branches.
Defoliation can be done on some deciduous trees. This involves removing all or most leaves. It encourages smaller leaves and more back-budding.
I once wired a maple branch. I wanted it to sweep downwards. I bent it too fast.
I heard a faint crack. Panic set in. I quickly unwired it.
I examined the branch. It looked okay. I waited a few weeks.
Then I tried again. This time, slowly, carefully. It worked.
That mistake taught me the value of patience. And gentle force.
Remember, you are not just cutting. You are creating a living sculpture. Think about the desired silhouette.
Think about the flow of energy. Each cut should have a purpose. It should contribute to the overall design.
Shaping Tools & Techniques
Wire: Aluminum or copper, various gauges.
Wire Cutters: Special tools for clean removal.
Concave Cutters: For clean cuts that heal flush.
Shears: For fine trimming and pinching.
Wiring Technique: 45-degree angle, smooth wraps.
Pruning: To shape, encourage ramification, and refine.
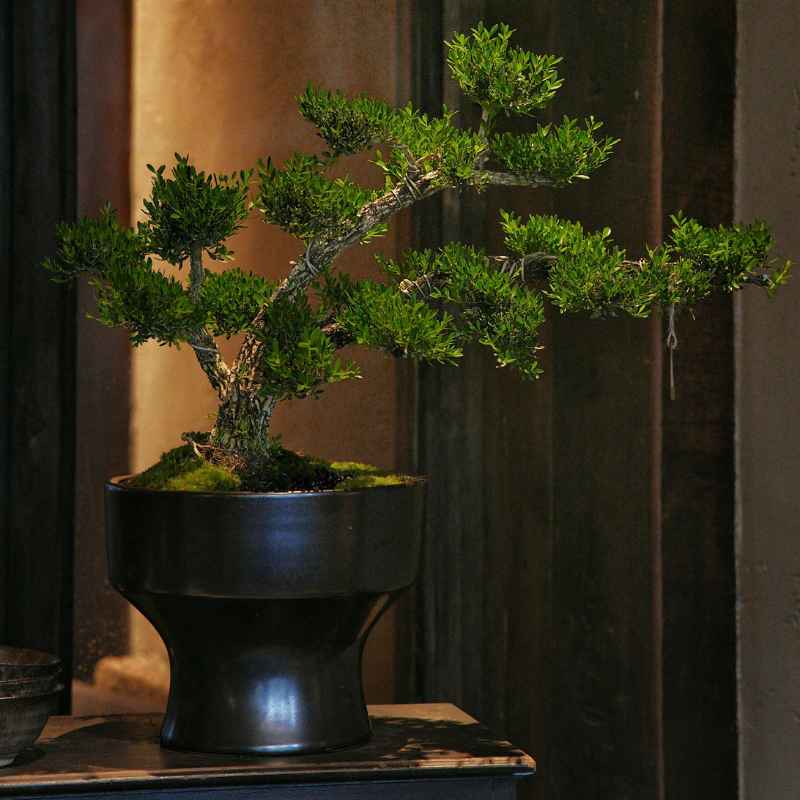
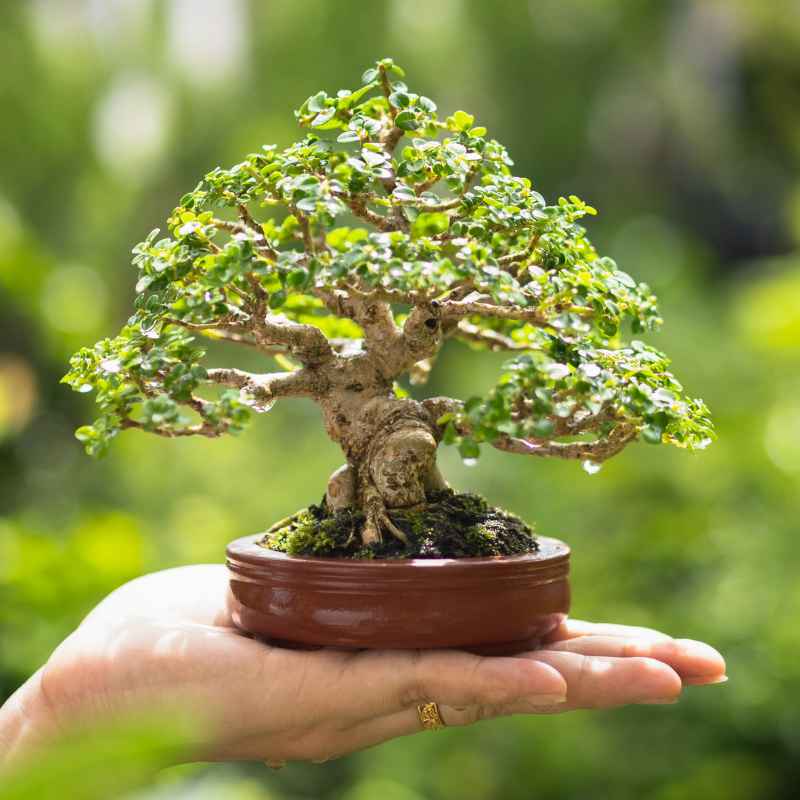
Choosing the Right Soil and Pot for Your Bonsai
As your tree matures, its soil and pot become critical. These are not just for aesthetics. They are for the health of the tree.
Bonsai soil is very different from regular potting soil. It needs to drain extremely well. It needs to be airy.
This prevents root rot. It also needs to hold some moisture. And provide nutrients.
A common mix is Akadama, pumice, and lava rock. Often in a 1:1:1 ratio. Akadama is a hard-baked clay.
It holds water and nutrients. Pumice is porous volcanic rock. It adds aeration and drainage.
Lava rock also adds aeration and drainage. It helps anchor the roots.
You can buy pre-mixed bonsai soil. Or mix your own. The exact mix can vary by species.
Conifers often prefer a grittier mix. Deciduous trees might like a bit more organic matter.
The pot is also very important. Bonsai pots are typically shallow. This restricts root growth.
This helps keep the tree small. It also encourages fine root development.
The pot needs to have good drainage holes. Often, there are multiple holes. And holes for wiring the tree into the pot.
This prevents it from toppling over.
Choose a pot that complements the tree. The color, shape, and texture of the pot should enhance the tree’s beauty. It should not compete with it.
When you repot, you will trim the roots. This is essential. It keeps the root ball manageable.
It encourages new feeder roots to grow. This is what absorbs water and nutrients.
Repotting is usually done every 1-3 years. Depending on the species and age of the tree. Younger, fast-growing trees need it more often.
Older trees might go 3-5 years between repots.
The timing for repotting is usually early spring. Just as the tree is waking up. This allows it to recover quickly.
And establish new roots before the heat of summer.
I once struggled with a juniper. Its needles were turning brown. I couldn’t figure out why.
I checked watering. I checked light. Everything seemed fine.
Then I realized I hadn’t repotted it in three years. The soil was compacted. The roots were a solid mass.
Repotting solved the problem. The tree perked right up.
This experience really hammered home how vital the soil and pot are. They are not just decorative. They are functional necessities for bonsai health.
Key Soil Components
Akadama: Japanese hard-baked clay. Holds water, nutrients.
Pumice: Volcanic rock. Adds aeration, drainage.
Lava Rock: Porous rock. Aeration, anchors roots.
Organic Matter: Compost or bark. For some species.
Pot Choice: Shallow, well-draining, complements tree.
Ongoing Care: Watering, Feeding, and Placement
Caring for a mature bonsai is a daily commitment. But it is a rewarding one.
Watering is the most critical task. Bonsai pots dry out quickly. Check the soil moisture daily.
Or even twice a day in hot weather. The top layer of soil should feel slightly dry. If it does, water thoroughly.
Water until it runs out of the drainage holes.
Use a watering can with a fine rose. This prevents washing away the soil. Or disturbing the surface roots.
Fertilizing is still important. Use a balanced bonsai fertilizer. Or a diluted general-purpose fertilizer.
Feed during the growing season. Reduce or stop in winter. Follow the product instructions.
Over-fertilizing can burn the roots.
Organic fertilizers are great. They release nutrients slowly. They also help build soil health.
Liquid fertilizers work faster. They are good for quick boosts.
Placement matters a lot. Most bonsai need plenty of light. Outdoor bonsai thrive in full sun.
Some might need protection from intense afternoon sun in summer. Indoor bonsai need bright light. A south-facing window is ideal.
If you don’t have enough natural light, consider grow lights.
Protect your bonsai from extreme weather. Strong winds can dry them out very fast. Hard freezes can damage roots.
In winter, some species need protection. This might mean moving them to a cool, unheated garage. Or burying the pot in the ground.
Regular inspection is key. Look for pests or diseases. Aphids, spider mites, and scale can be problems.
Catch them early. Treat them with insecticidal soap or neem oil. Good airflow and proper watering help prevent many issues.
Grooming is ongoing. Pinch back new shoots. Remove dead leaves and twigs.
Keep the shape tidy. This maintains the bonsai’s aesthetic. It also encourages denser growth.
What if you’re going on vacation? Arrange for someone to water your bonsai. Or use self-watering systems.
But be cautious with these. They are not always reliable for bonsai.
I’ve learned that bonsai care is about observation. It’s about understanding the tree’s needs. It’s about being present.
When you are mindful, you catch problems early. You make better decisions. This connection is what makes bonsai living art.
Daily Bonsai Care Checklist
Water: Check soil daily, water when dry.
Light: Ensure adequate sunlight or grow lights.
Inspect: Look for pests, diseases, or damage.
Groom: Remove dead material, pinch new growth.
Fertilize: During growing season, as per instructions.
Environment: Protect from extreme weather.
Common Challenges When Growing Bonsai from Seed
Even with the best intentions, you might face challenges. Here are some common ones.
Non-viable seeds: Some seeds just won’t sprout. This is often due to improper storage. Or a lack of necessary pre-treatment like stratification.
Damping off: This is a fungal disease. It attacks seedlings at the soil line. It causes them to rot and fall over.
Good airflow and sterile seed-starting mix help prevent this. Avoid overwatering.
Leggy seedlings: These stretch towards the light. They become weak and spindly. This happens when seedlings don’t get enough light.
Or the light source is too far away. Use grow lights or a very bright spot.
Pests and diseases: As trees mature, they can attract pests. Aphids, spider mites, and mealybugs are common. Regular inspection and early treatment are key.
Wire scars: If wire is left on too long, it can damage the bark. This leaves permanent scars. Always monitor wired branches.
Remove wire before it digs in.
Poor root development: Circling roots or a compacted root ball can stunt growth. Regular repotting and root pruning are essential.
Nutrient deficiencies: Yellowing leaves or slow growth can indicate a lack of nutrients. Ensure proper fertilization.
Overwatering: This is a very common mistake. It leads to root rot. Always check soil moisture.
Let the top inch dry out before watering again.
Underwatering: Just as bad as overwatering. It stresses the tree. Causes leaf drop.
Always water thoroughly when the soil is dry.
The key to overcoming challenges is to stay calm. Research the problem. And act accordingly.
Most issues can be resolved with timely intervention.
My first maple struggled with fungus gnats. They are annoying but mostly harmless to mature trees. But they can bother seedlings.
I found that letting the soil dry out a bit more helped. And using a sticky trap. It was a small problem.
But it made me worried.
Remember that every grower faces issues. It is part of the learning process. Each challenge is a chance to learn more.
To become a better bonsai artist.
Troubleshooting Common Issues
Seeds won’t sprout? Check stratification and viability.
Seedlings falling over? Suspect damping off. Improve airflow, avoid overwatering.
Weak, long stems? Increase light exposure.
Brown needles/leaves? Could be watering issues, pests, or disease.
Bark damage? Wire was left too long. Prevent by monitoring.
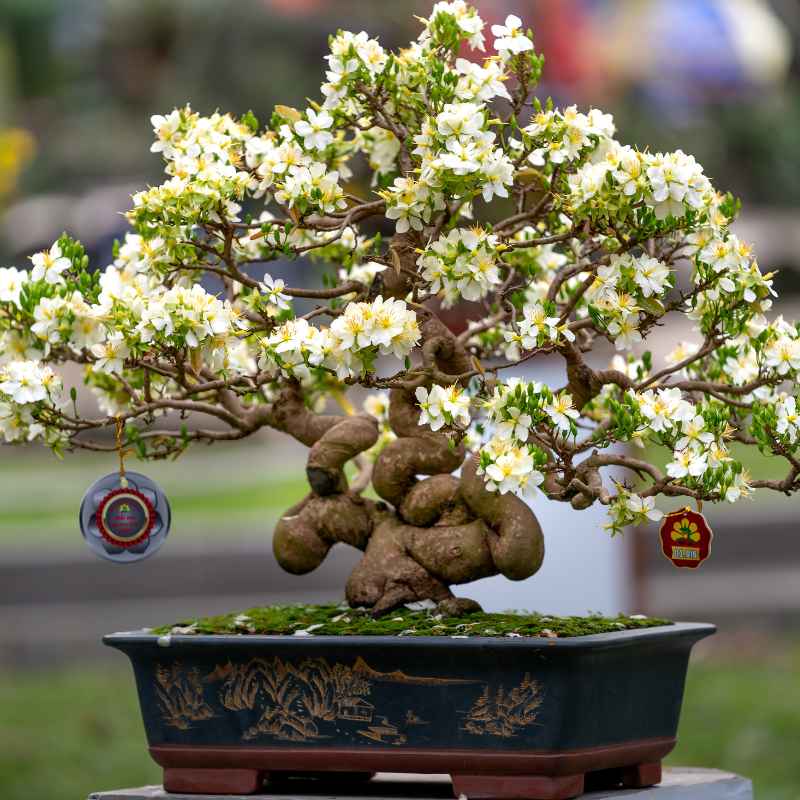
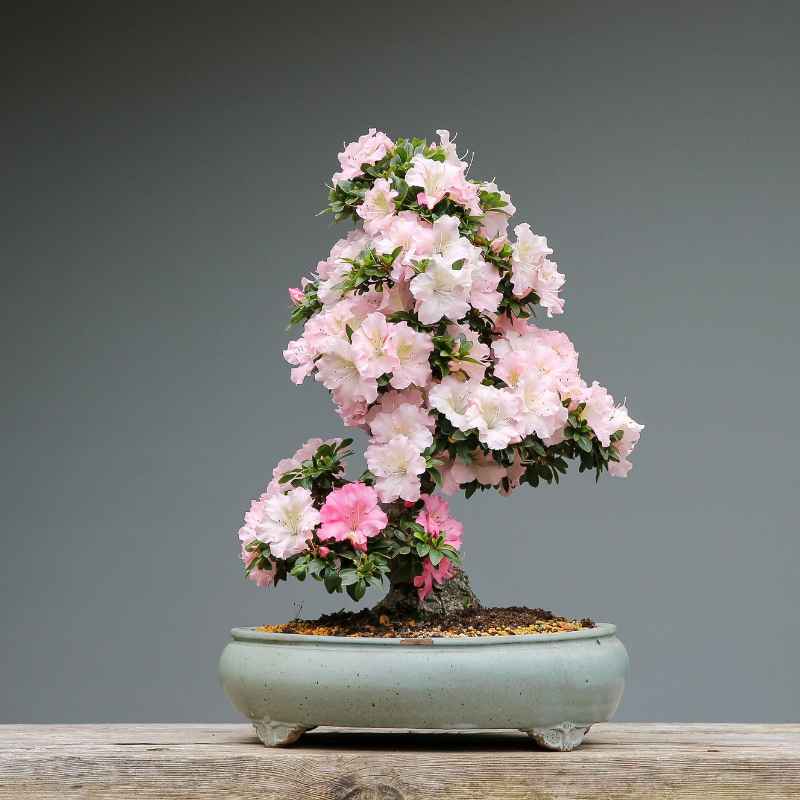
The Long Game: Patience and Progression
Growing bonsai from seed is a marathon, not a sprint. It takes years. Some species take decades to reach a mature, artistic form.
The beauty is in the journey. It is in the daily care. It is in watching your tree evolve.
It is in the connection you build with it.
Do not compare your young tree to a finished masterpiece. Every great bonsai was once a seed. It was once a seedling.
It went through all the stages. It faced its own challenges.
Celebrate small victories. The first time you wire a branch successfully. The first time the tree flowers or fruits.
The first time you achieve a pleasing shape.
As your tree grows, your skills will grow too. You will learn to read its needs. You will develop your artistic eye.
You will become a true bonsai artist.
Think about the future. What style do you envision for your tree? What species will you choose next?
The world of bonsai is vast. And the journey of growing from seed is the most fulfilling way to explore it.
When I look at my oldest bonsai, grown from seed, I feel a deep sense of pride. It has been with me for over 15 years. We have grown together.
It has seen me through many life changes. This living connection is what bonsai is all about. It is a testament to time, care, and nature’s magic.
Frequently Asked Questions About Growing Bonsai from Seed
How long does it take to grow a bonsai from seed?
It takes a long time! Expect at least 3-5 years before you can begin significant styling. A truly mature bonsai can take 10-20 years or much longer.
The process is about patience and enjoying each stage of growth.
What are the easiest tree seeds to grow for bonsai?
Some easier choices include Japanese Maple (Acer palmatum), Chinese Elm (Ulmus parvifolia), Juniper (Juniperus), and some Pines (Pinus). These species are generally hardy and respond well to training.
Do I need special tools to start bonsai from seed?
For starting seeds, you need basic gardening supplies: pots, soil, a watering can, and good light. For later shaping, you’ll need bonsai tools like shears, wire cutters, and bonsai wire. But to just start from seed, you don’t need many specialized items.
Can I grow bonsai indoors from seed?
Yes, but it’s best for certain species. Tropical and sub-tropical trees like Ficus or Serissa do well indoors. Many temperate climate trees (like Maples, Pines, Elms) need outdoor seasons to thrive.
Ensure indoor bonsai get very bright light.
What if my seeds don’t stratify properly?
If your seeds don’t sprout after the intended stratification period, they might need longer. Or perhaps the stratification conditions weren’t ideal (too wet, too dry, wrong temperature). You can try re-stratifying them or research specific needs for your species.
How often should I repot a young bonsai grown from seed?
Young bonsai in their rapid growth phase should be repotted annually or every two years. This refreshes the soil and allows you to prune roots to encourage a compact, healthy root system. Mature bonsai may only need repotting every 3-5 years.
Conclusion
Embarking on the journey of growing bonsai from seed is a deeply rewarding experience. It requires patience, observation, and a willingness to learn. From selecting the right seeds to nurturing delicate seedlings and eventually shaping a living sculpture, each step offers unique insights into the natural world.
While challenges may arise, they are simply opportunities for growth. The slow, deliberate progress of a bonsai grown from its very beginning fosters a profound connection between you and your tree, creating a unique piece of living art that evolves with time.