Training a Thunderhead Black Pine for bonsai involves understanding its growth habits. Key steps include careful pruning, strategic wiring, and proper soil and watering. Patience is vital.
This process transforms a young tree into a miniature masterpiece. It requires consistent attention to detail.
What Makes Thunderhead Black Pine Special for Bonsai
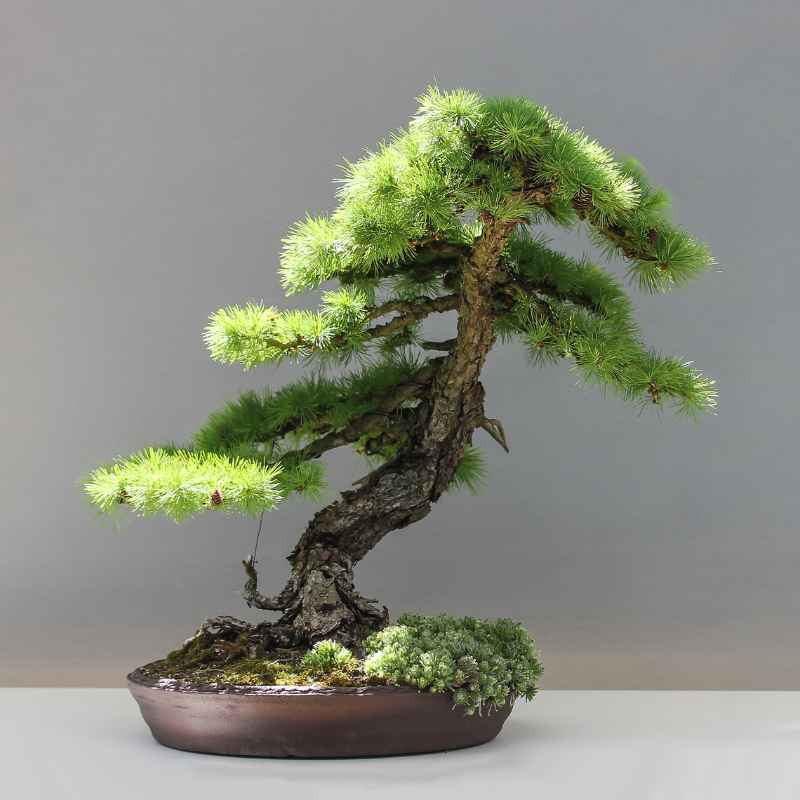
Thunderhead Black Pine (Pinus thunbergii ‘Thunderhead’) is a truly striking choice for bonsai. It’s not just any pine. It has unique features that make it stand out.
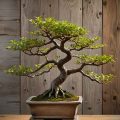
Its growth pattern is naturally dense. The needles are short and stout. They often grow in tight, compact clusters.
This is called a “thunderhead” formation. It gives the tree a powerful, rugged look. This look is very desirable in bonsai.
It mimics old, weathered trees found in nature.
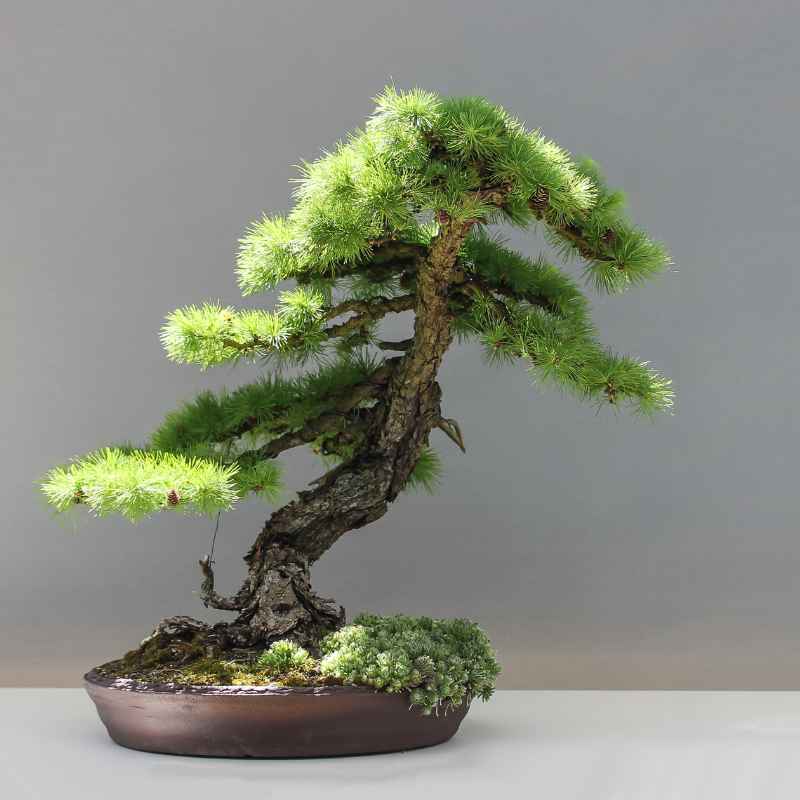
What really sets it apart is its structure. The branches tend to be thick and heavy-looking. They grow outward and upward.
This gives the tree a strong, grounded appearance. This makes it look like a much older, more established specimen. Even young trees can have this mature feel.
It’s this natural character that makes it such a rewarding tree to train.
Another great thing is its resilience. Like other Japanese Black Pines, Thunderheads are tough. They can handle different weather conditions.
They are quite forgiving of minor mistakes. This is good news for beginners. It means you have a little more room to learn as you go.
You can experiment with techniques without as much fear of killing the tree. This allows for more creative freedom.
The needles are also key. They are a deep, dark green. They are also very stiff.
This makes them hold their shape well. They don’t droop or look messy. When they grow in those dense clusters, they look like little explosions of greenery.
This visual impact is a big part of the Thunderhead’s appeal. It adds texture and depth to the bonsai.
So, when you look at a Thunderhead Black Pine, you see potential. You see a tree that already has a lot of character. It’s like having a head start.
Your job is to refine that character. You want to guide its natural tendencies. You want to bring out its best features.
You are shaping its future as a miniature work of art. It’s an exciting journey of creation.
My First Thunderhead: A Tale of Over-Enthusiasm
I remember the first Thunderhead Black Pine I ever bought. It was a young nursery stock plant. It was maybe three years old.
The trunk was thick for its size. The branches were already starting to look interesting. I was so excited to get it into a nice pot.
I wanted to make it a bonsai right away. I thought I knew everything.
I got it home. I immediately started hacking away at it. I wanted to remove all the “unwanted” growth.
I wanted it to look like the pictures I’d seen. I trimmed off needles. I cut back branches that looked too long.
I even tried wiring some of the smaller twigs. I was very aggressive. I felt like a master sculptor.
Within a few weeks, I started to panic. The tree looked terrible. It was sparse.
It was lopsided. The needles started to turn brown and fall off. It looked sick.
I had completely misunderstood its natural growth. I had tried to force it into a shape it wasn’t ready for. I had removed too much foliage.
I had stressed it out. The smell of pine needles was usually a happy one for me. But that year, it smelled like regret.
I learned a very hard lesson. You can’t just chop and wire any pine tree into a bonsai shape. Especially not a Thunderhead.
It needs a more thoughtful approach. It needs a gentle hand. It needs understanding of its own unique way of growing.
That first experience taught me patience. It taught me to observe. It taught me to respect the tree’s natural form.
It was a humbling, but necessary, beginning.
Understanding Thunderhead Growth Patterns
Natural Growth: Thunderheads grow in dense tufts. Needles are short and stiff.
Branching: Branches are naturally thick and angled upwards.
Foliage Clusters: Look for the characteristic “thunderhead” look.
Patience is Key: Don’t rush the shaping process. Let the tree guide you.
The Art of Pruning: Guiding the Thunderhead
Pruning is probably the most important tool in your bonsai training kit. For a Thunderhead Black Pine, it’s about more than just cutting. It’s about subtle manipulation.
You’re guiding its natural growth. You’re shaping its future. The goal is to enhance its dense, powerful look.
You want to create a sense of age and character.
There are two main types of pruning for pines. There is maintenance pruning. There is also structural pruning.
You’ll do both with your Thunderhead. Maintenance pruning keeps things tidy. It encourages more ramification.
Ramification means creating more branches and finer twigs. Structural pruning shapes the overall form. It defines the main lines of the tree.
Let’s talk about candle pruning first. This is a technique specific to pines. It happens in spring.
New growth shoots appear. These are called candles. You’ll see them pushing out from the tips of branches.
For a Thunderhead, you often want to shorten these candles. This is done by cutting them. You can cut them with your fingers.
Or you can use sharp bonsai shears.
The timing and amount you cut are important. If you don’t prune the candles, they will grow long. The needles will become spaced out.
This ruins the dense look. By cutting the candles back, you force the tree to produce new buds. These buds will grow shorter shoots.
They will have denser needles. This helps keep the foliage tight and compact.
Most Thunderheads benefit from having their candles cut in half. Some might need more. Others might need less.
It depends on the tree’s vigor. It also depends on your desired outcome. For a very dense look, you might cut more.
For a slightly more open feel, you might cut less. Always observe your tree. See how it responds.
Structural pruning is different. This is usually done in late winter or early spring. Before the sap starts to run strongly.
Or you can do it in the fall. This is when you remove entire branches. You might remove branches that are growing in the wrong direction.
Or branches that are too thick. You might remove branches that cross. Or branches that are growing straight down.
When you remove a branch, use clean, sharp tools. Make the cut flush with the trunk or the branch it was attached to. This helps the wound heal cleanly.
It also makes the scar less noticeable over time. You want the trunk and branches to look natural. No stubs sticking out.
This careful work builds the foundation of your bonsai.
Remember, less is often more. Especially when you’re starting. It’s easy to get carried away.
You might think you’re making progress by cutting a lot. But you can easily overdo it. Over-pruning can weaken the tree.
It can even kill it. So, take your time. Step back often.
Look at the tree from different angles.
Consider the overall silhouette. You want a balanced tree. You want some open space.
This allows light to reach the inner foliage. It also makes the tree look less dense and heavy. You want to create depth.
Imagine where the branches would naturally grow in the wild. Try to mimic that. But refine it.
It’s a balance. You want to encourage density. But you also want to maintain good air circulation.
You want to promote healthy growth. Every cut you make is a decision. It affects the future of the tree.
So make each cut with purpose. Think about what you want to achieve. This thoughtful approach will lead to a beautiful bonsai.
Pruning Quick Guide
Candle Pruning (Spring): Shorten new growth shoots by half. Encourages dense foliage.
Structural Pruning (Late Winter/Fall): Remove unwanted branches. Define main lines.
Tools: Use sharp bonsai shears or concave cutters.
Healing: Make clean cuts. Allow wounds to heal naturally.
Observe: Watch how the tree responds. Adjust your approach.
Wiring Techniques for Thunderhead Black Pine
Wiring is another crucial technique for shaping bonsai. It allows you to bend and position branches. You can create the desired flow and form.
For Thunderhead Black Pine, wiring needs to be done carefully. The branches can be brittle. You want to avoid breaking them.
But you also want to achieve natural-looking curves.
What kind of wire should you use? Anodized aluminum wire is a good choice. It’s soft enough to bend easily.
It’s also strong enough to hold branches in place. Copper wire is another option. It’s stronger.
But it can be harder to work with. It can also react with the tree’s sap. Aluminum is usually preferred for pines.
The thickness of the wire matters. You want to use a wire that is about one-third the thickness of the branch you are wiring. If the wire is too thin, it won’t hold.
If it’s too thick, it can damage the bark. You might need to use two pieces of wire. You can join them together.
This gives you more strength for thicker branches.
How do you apply the wire? Start by anchoring the wire. You can anchor it to the trunk.
Or you can anchor it to a stronger branch. Wrap the wire around the branch. Do this at a 45-degree angle.
Wrap it snugly but not too tight. You want it to be secure. But you don’t want to cut into the bark.
When you wrap the wire, try to make the coils even. They should not overlap too much. If they do, it can restrict growth.
Or it can cause scarring. You’re aiming for a smooth, natural curve. Don’t force the branch into a shape.
Gently coax it. Bend it slowly.
If a branch feels too stiff, you can try wiring two branches together. Or you can use a different anchor point. Sometimes, you can get a better bend by wiring two branches that are close together.
Then you can use one to help support the other. This distributes the stress.
How long should you leave the wire on? This is a critical question. You need to remove the wire before it starts to cut into the bark.
This can happen as the branch grows thicker. Check the wire regularly. Look for any signs of the bark being compressed.
Or any red lines appearing under the wire.
This might be only a few months for some branches. For others, it could be a year or more. It depends on the tree’s growth rate.
It also depends on the thickness of the branch. Once you remove the wire, the branch should hold its shape. If it doesn’t, you can re-wire it.
But give the bark time to heal first.
When you remove the wire, cut it off in small pieces. Do not try to unwind it. This can damage the branch.
Use wire cutters. Cut the wire between the coils. Then gently pull the pieces out.
It might take a little practice. But this method is much safer for the tree.
Wiring isn’t just about bending. It’s also about placement. You want branches to extend outwards.
You want them to be spaced well. You want to create layers of foliage. Think about creating a sense of depth.
The wire helps you achieve this. It lets you position branches so they don’t obscure each other.
For Thunderheads, you often want to wire the branches upwards or outwards. This reinforces their natural tendency. It makes them look strong and established.
Avoid wiring branches straight down. That rarely looks natural on a pine bonsai. Unless you’re trying for a very specific cascade style.
It’s a delicate dance. You’re working with living material. You’re trying to shape it.
You need to be sensitive to its needs. Observe your tree. Learn its limits.
And be patient. The best bonsai are not made overnight. They are the result of many years of careful work.
Wiring is a big part of that journey.
Wiring Best Practices
Wire Type: Use anodized aluminum wire.
Wire Thickness: About 1/3 the diameter of the branch.
Anchoring: Secure the wire to the trunk or a strong branch.
Wrapping: Apply at a 45-degree angle. Snug but not tight.
Monitoring: Check regularly for cutting into bark. Remove before damage occurs.
Removal: Cut wire off in small pieces. Do not unwind.
Soil, Watering, and Feeding: The Foundation of Health
A healthy tree is the base for good bonsai training. The right soil, watering, and feeding are essential. For Thunderhead Black Pine, these basics are very important.
They ensure the tree has the energy it needs. It needs energy to grow. It needs energy to heal.
It needs energy to push out new growth.
Let’s start with soil. Pines like well-draining soil. This is very important.
They hate sitting in wet conditions. Wet roots can lead to rot. A good bonsai soil mix for pines usually contains three main things.
These are akadama. It’s a hard-baked clay. It holds water and nutrients.
It also breaks down over time. There is also pumice. Pumice is a volcanic rock.
It provides aeration. It helps with drainage. And there is lava rock.
Lava rock is porous. It also helps with drainage. And it adds some structure.
A common mix is 1:1:1. One part akadama, one part pumice, one part lava rock. You can adjust this.
If your climate is very dry, you might add a little more akadama. If it’s very wet, you might use more pumice and lava rock. The key is that water drains through quickly.
It should not stay soggy.
Watering is another area where people often make mistakes. The rule of thumb is to water when the soil starts to dry out. But not when it’s bone dry.
Feel the soil. Stick your finger in about an inch. If it feels dry, it’s time to water.
If it feels moist, wait. It’s better to water too much than too little. But don’t drown the tree.
When you water, water thoroughly. Water until it runs out of the drainage holes at the bottom of the pot. This ensures that all the soil is moistened.
It also helps to flush out any accumulated salts from fertilizers. In hot weather, you might need to water daily. In cooler weather, maybe only once or twice a week.
What about feeding? Pines are not heavy feeders. You don’t want to over-fertilize them.
This can lead to too much growth. It can lead to long needles. It can make the tree leggy.
A balanced fertilizer is good. You can use a slow-release granular fertilizer. Or you can use a liquid fertilizer.
If you use granular fertilizer, apply it in spring. And again in fall. If you use liquid fertilizer, dilute it.
Use it at half strength. Apply it every two to four weeks during the growing season. That’s from spring to early fall.
Stop fertilizing in late fall. And don’t fertilize in winter.
The goal of feeding is to keep the tree healthy. It’s not to make it grow as fast as possible. You want steady, controlled growth.
This supports the bonsai form. It allows for fine ramification. It helps the tree recover from pruning.
It keeps the needles short and dark.
Remember that the pot size affects watering. Smaller pots dry out faster. Larger pots hold moisture longer.
Also, the type of pot material matters. Ceramic pots tend to retain moisture more than plastic pots. Consider these factors when deciding how often to water.
Proper soil, watering, and feeding are the silent partners in bonsai training. They are not as exciting as pruning or wiring. But they are absolutely vital.
A strong, healthy tree will respond better to training. It will recover faster. It will look better.
It will live longer. So, pay attention to these fundamentals. They are the bedrock of your bonsai success.
Essential Care Checklist
Soil Mix: Well-draining. Akadama, pumice, lava rock (1:1:1 ratio common).
Watering: Water when soil feels dry. Water thoroughly until drainage occurs.
Fertilizing: Use balanced fertilizer at half strength. During growing season only.
Avoid: Over-watering and over-fertilizing.
Repotting and Root Pruning: Giving Your Pine Room to Grow
Repotting is a necessary part of bonsai care. It’s not something you do every year. But it’s important to do it at the right time.
For young, vigorous trees, you might repot every two to three years. For older, more established trees, every three to five years might be enough.
When is the right time to repot? The best time for Thunderhead Black Pine is early spring. Just as the new growth is starting.
But before the candles have elongated. This is when the tree is ready to grow. It can recover quickly from the stress of repotting.
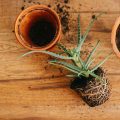
What are the signs that your tree needs repotting? One sign is that the roots have filled the pot. You might see them circling the inside of the pot.
Or they might be growing out of the drainage holes. Another sign is that the soil is not draining well anymore. It might stay wet for too long.
This indicates that the soil has broken down. Or that the roots are too dense.
When you repot, you’ll remove the tree from its pot. Gently tease out the roots. You can use a root hook or a chopstick.
Work from the outside in. Remove about one-third to one-half of the old soil. This is a good opportunity to inspect the roots.
Look for any dead or damaged roots. You can trim these off with clean, sharp scissors. You want to encourage new, fine feeder roots.
You want to keep the root system compact. This helps the tree fit in its bonsai pot. And it helps it absorb water and nutrients efficiently.
When you prune the roots, don’t be afraid. Healthy pines can handle it. But again, don’t overdo it.
Aim to remove the older, thicker roots. Keep the younger, finer ones. These are the ones that do the work.
After pruning the roots, you’ll repot the tree into a clean bonsai pot. Use your fresh bonsai soil mix. Make sure to work the soil in around the roots.
This eliminates air pockets. You can use a chopstick to poke the soil down. This helps it settle in.
Ensure the tree is planted at the same depth as before. Or slightly higher if you want to encourage surface roots.
After repotting, water the tree thoroughly. Keep it in a shaded, protected spot for a few weeks. Avoid direct sunlight.
Avoid strong winds. This allows the tree to recover. It helps the new roots start to grow.
Don’t fertilize for at least a month after repotting. The new soil has nutrients. And the tree is still recovering.
Repotting might seem daunting. Especially the root pruning part. But it’s crucial for long-term health.
It prevents the tree from becoming root-bound. It rejuvenates the soil. It keeps the tree healthy and vigorous.
A healthy root system means a healthy tree. And a healthy tree is a joy to train.
Repotting Timeline
Frequency: Young trees every 2-3 years; Older trees every 3-5 years.
Timing: Early spring, just as new growth begins.
Signs: Roots circling pot, poor drainage.
Root Pruning: Remove 1/3 to 1/2 of root mass. Focus on thick, old roots.
Post-Repot: Shade for 2-3 weeks. Water thoroughly. No fertilizer for a month.
Shaping the Mature Thunderhead: Advanced Techniques
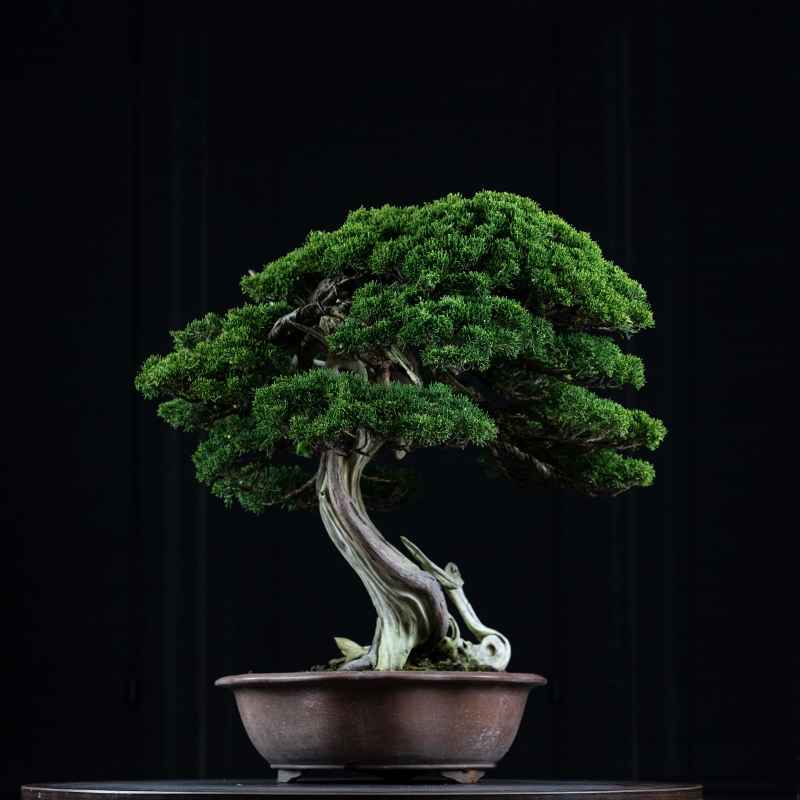
Once your Thunderhead Black Pine has a good basic structure, you can refine it further. This is where advanced techniques come into play. These help create the illusion of age.
They add character and depth. It’s about making your bonsai look like a miniature version of a grand old tree.
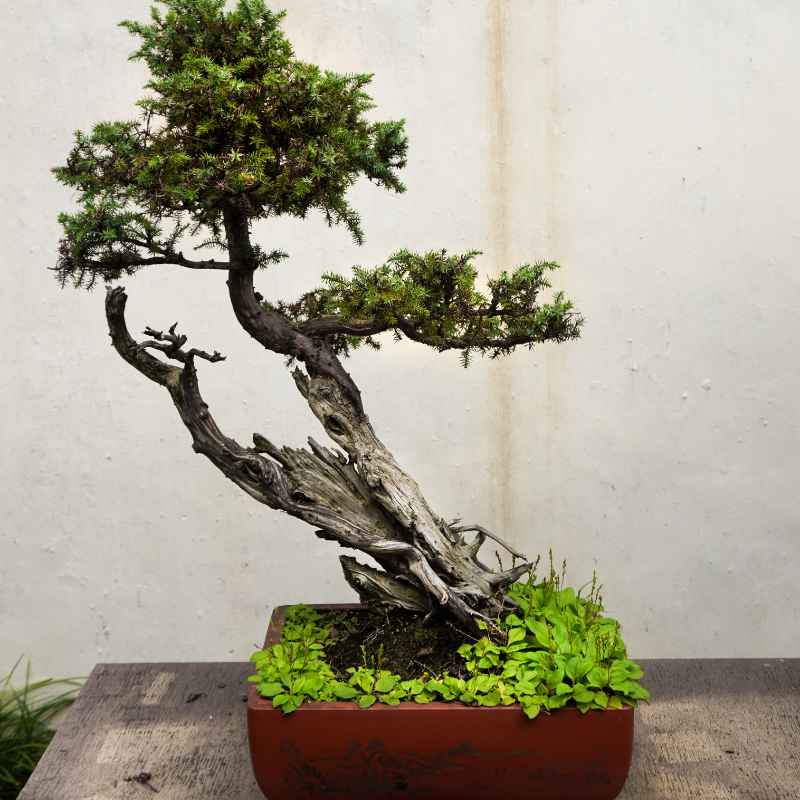
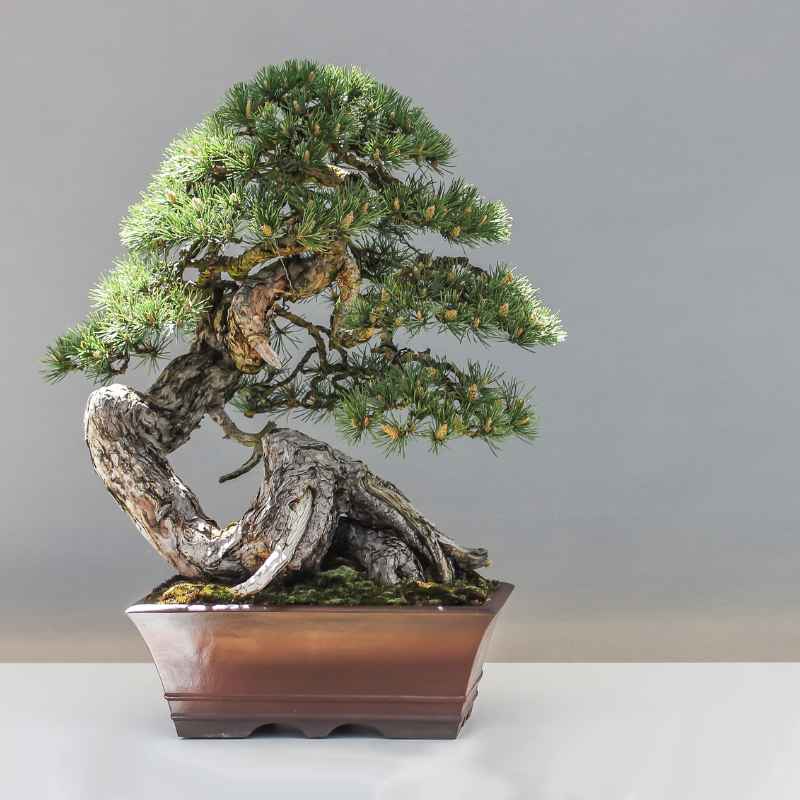
One technique is creating deadwood. This is called jin and shari. Jin is when you create a dead, bleached branch.
Shari is when you strip bark from a living trunk or branch. This makes the tree look like it has survived hardship. It adds a sense of drama and history.
Creating jin involves carefully removing bark from a branch. You then scrape the wood smooth. You can then apply lime sulfur.
This bleaches the wood. It also protects it from decay. You choose branches that are no longer needed.
Or branches that you want to appear dead. You don’t want to create deadwood on branches that are essential for the tree’s structure.
Shari is similar. You remove bark from a section of the trunk or a main branch. You want to create a flowing line.
Not just a straight strip. You might scrape the wood to give it texture. Then apply lime sulfur.
This makes it look like aged wood. It can be very effective in creating a sense of immense age.
Another advanced technique is air layering. This is a way to propagate a branch. You can use it to create a new tree.
Or you can use it to create a lower branch on an existing tree. It involves removing a ring of bark from a branch. Then wrapping that section in damp sphagnum moss.
And then covering it with plastic. Roots will form. You can then cut the branch off.
And plant it.
The goal of advanced techniques is to enhance the natural beauty of the tree. It’s about creating visual interest. It’s about telling a story.
A tree with jin and shari might look like it has been through storms. Or harsh winters. It adds a narrative to the bonsai.
When considering advanced techniques, always ask yourself: does this serve the overall design? Does it enhance the tree’s character? Is it appropriate for a Thunderhead Black Pine?
These techniques require skill. And a good understanding of how the tree grows and heals.
It’s also important to note that these techniques are not for every tree. Not every bonsai needs deadwood. Sometimes, a tree with lush, healthy foliage is beautiful on its own.
It depends on the style you are aiming for. And the natural character of the specific tree you are working with.
Patience is the biggest virtue here. Creating believable deadwood takes time. Allowing bark to heal after shari takes time.
Air layering takes time. Rushing these processes can lead to mistakes. It can damage the tree.
So, embrace the slow pace. Enjoy the process of refining your bonsai. The journey is as rewarding as the destination.
Advanced Styling Concepts
Jin: Creating bleached, dead branches to show age.
Shari: Stripping bark from trunk/branches to mimic natural wear.
Air Layering: Propagating branches to create new trees or lower branches.
Purpose: To enhance realism, suggest age, and create a story.
Common Problems and How to Address Them
Even with the best care, Thunderhead Black Pines can encounter problems. Knowing what to look for is key. And knowing how to fix it.
Most issues stem from improper watering. Or pests. Or diseases.
Fortunately, many problems are manageable.
One common issue is needle browning or drop. This can be caused by several things. Over-watering is a big culprit.
If the roots are constantly wet, they can’t breathe. This stresses the tree. The needles might turn yellow, then brown, and drop.
Under-watering is also a problem. If the soil gets too dry, the needles will crisp up. And fall off.
Another cause of needle browning is salt buildup. This comes from using too much fertilizer. Or from not flushing the soil properly.
Watering deeply until water runs out of the pot helps prevent this. If you suspect salt buildup, you can do a thorough flush. Soak the pot in water for an hour.
Pests are also a concern. Common pine pests include spider mites. And scale insects.
Spider mites are tiny. They create fine webbing. They suck sap from the needles.
Scale insects look like small bumps on the branches and needles. They also feed on sap.
How do you deal with pests? For minor infestations, you can often wash them off. Use a strong stream of water.
Or wipe them off with a damp cloth. For more serious infestations, you might need to use an insecticidal soap. Or a horticultural oil.
Always follow the product instructions carefully. And test on a small area first.
Diseases can also affect Thunderhead Pines. Fungal diseases like needle cast can cause browning and dropping. These often happen in humid conditions.
Good air circulation is important to prevent fungal issues. Proper spacing of branches helps. And avoid overhead watering.
If you see signs of disease, remove affected needles. And try to improve air circulation. You might need to use a fungicide.
Again, follow product directions. Prevention is always better than cure. So focus on good cultural practices.
Another problem is weak growth. This can happen if the tree isn’t getting enough light. Or if it’s not being fertilized properly.
Thunderheads need plenty of sun. They also need some nutrients to fuel their growth. Ensure your tree is in a sunny spot.
And that you are fertilizing appropriately.
Sometimes, branches can die back. This can be due to a broken branch. Or due to a disease.
Or sometimes, it’s just a branch that wasn’t getting enough light. If a branch dies, prune it off cleanly. Make sure to get all the dead wood.
The key to solving problems is observation. Look at your tree every day. Get to know its normal appearance.
Then you’ll be able to spot issues early. When you do find a problem, don’t panic. Most issues can be addressed with the right approach.
And a little persistence.
Troubleshooting Common Issues
Needle Browning: Check watering (too much or too little), salt buildup, or pests.
Pests (Mites, Scale): Wash off, use insecticidal soap or horticultural oil.
Fungal Diseases: Improve air circulation, remove affected needles, use fungicide.
Weak Growth: Ensure adequate light and proper fertilization.
Branch Dieback: Prune off dead wood cleanly.
The Journey of a Thunderhead Bonsai
Training a Thunderhead Black Pine is a long-term commitment. It’s not a quick project. It requires patience.
It requires dedication. But the rewards are immense. You are creating a living work of art.
You are shaping a piece of nature. You are bringing the grandeur of a large tree into a miniature form.
Each stage of the training process is important. From the initial pruning and wiring to the advanced styling. Every decision you make contributes to the final outcome.
It’s a journey of learning and growing. Both for you and for the tree.
What you’ll find is that the tree starts to tell you what it needs. You’ll learn to read its signals. You’ll understand its preferences.
It becomes a dialogue. A partnership between you and the plant. This connection is one of the most fulfilling aspects of bonsai.
Don’t be discouraged by mistakes. Every bonsai artist makes them. My first Thunderhead was a disaster.
But I learned from it. You will too. The key is to keep learning.
Keep observing. Keep practicing. And most importantly, enjoy the process.
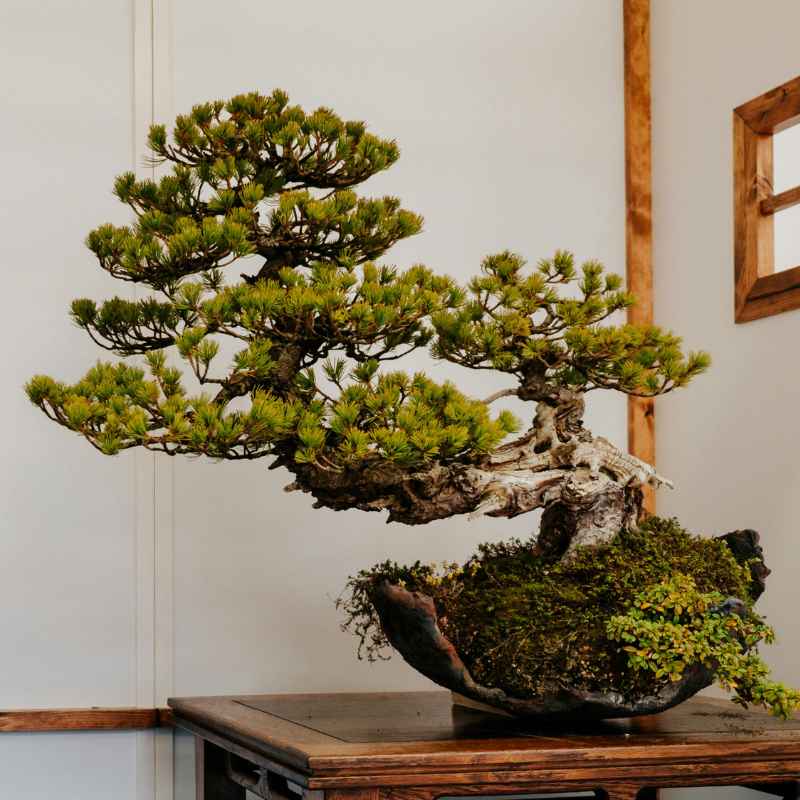
A well-trained Thunderhead Black Pine can be a stunning centerpiece. It embodies strength and resilience. It brings a touch of the wild into your home or garden.
It’s a testament to your skill and your patience. It’s a piece of living history. A miniature landscape that evolves over time.
So, embrace the challenge. Take the time to understand your Thunderhead. Use these techniques thoughtfully.
And enjoy the incredible journey of creating a beautiful bonsai.
Frequently Asked Questions About Training Thunderhead Black Pine
When is the best time to prune a Thunderhead Black Pine?
The best time for pruning is in spring. This is when you perform “candle pruning.” You shorten the new growth shoots. You can also do structural pruning in late winter or fall.
This is when you remove entire branches.
How often should I water my Thunderhead Black Pine bonsai?
Water your pine when the soil starts to feel dry. Stick your finger about an inch into the soil. If it’s dry, water thoroughly until water runs out of the drainage holes.
Watering frequency depends on your climate and the pot size.
Can I wire Thunderhead Black Pine branches year-round?
Wiring can be done at various times. However, it’s crucial to monitor the wire closely. Remove it before it cuts into the bark.
This can happen in just a few months or take up to a year. Avoid wiring during periods of extreme heat or cold if possible.
What kind of soil is best for Thunderhead Black Pine bonsai?
Thunderheads need well-draining soil. A common mix includes akadama, pumice, and lava rock. A 1:1:1 ratio is often used.
The main goal is to prevent waterlogging.
How do I deal with yellowing needles on my pine?
Yellowing needles can mean several things. It could be over-watering, under-watering, or nutrient deficiency. Check your watering routine.
Ensure the soil drains well. Consider a balanced fertilizer during the growing season.
Is it safe to create deadwood (jin and shari) on a Thunderhead Black Pine?
Yes, it is safe and often done to enhance the appearance of age. However, it requires skill and careful execution. Always apply lime sulfur after creating jin or shari to protect the exposed wood.
What is candle pruning and why is it important?
Candle pruning is shortening the new spring growth shoots, called candles. This is vital for Thunderhead Black Pines. It encourages shorter needles and denser foliage.
This maintains the characteristic “thunderhead” look and prevents the tree from becoming leggy.