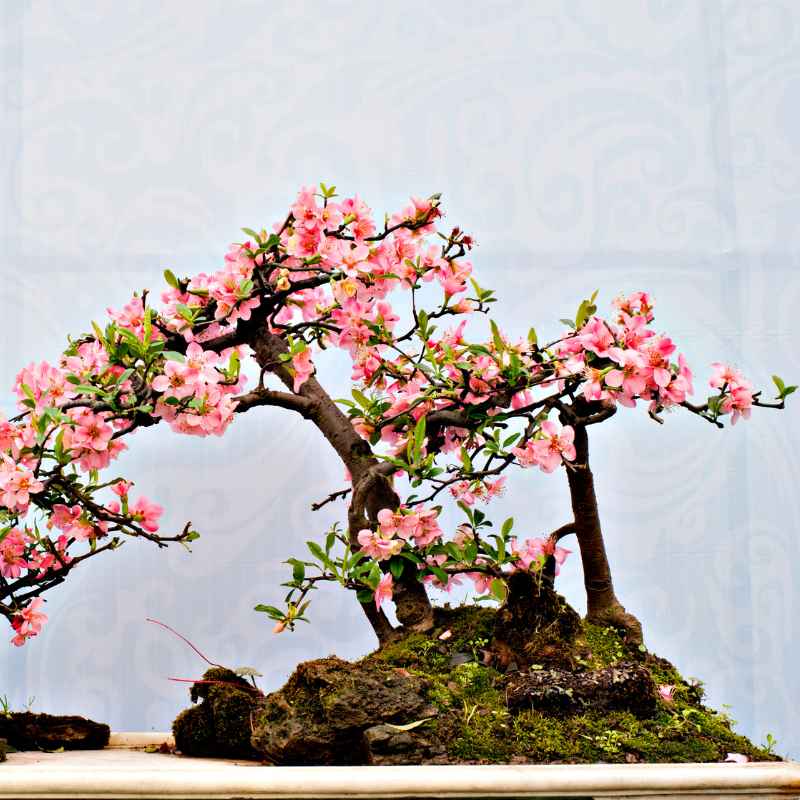
How Long to Stratify Japanese Cherry Blossom Bonsai Seeds?
Stratifying Japanese cherry blossom bonsai seeds requires patience and precision, with the cold treatment period typically lasting between 60 and 120 days. This post explains the exact stratification timeline, the science behind cold treatment, and how to get your seeds to sprout successfully.
Simply put, Japanese cherry blossom bonsai seeds need 60 to 120 days of cold, moist stratification at temperatures between 33°F and 41°F (1°C to 5°C) to break dormancy and germinate reliably. The exact duration depends on the specific cherry species, seed freshness, and consistency of your cold treatment method.
Key Takeaways
- Stratify Japanese cherry blossom bonsai seeds for 60 to 120 days at 33°F to 41°F to break seed dormancy effectively.
- Cold, moist stratification mimics the natural winter cycle that cherry seeds require before germination.
- Species like Prunus serrulata and Prunus incisa may need different treatment lengths, so check your seed variety.
- Fresh seeds stratify faster than older seeds, with germination rates dropping significantly after the first year of storage.
- After stratification, a gradual warming period and consistent moisture are essential for successful sprouting.

What Is Seed Stratification and Why Do Cherry Blossom Bonsai Seeds Need It?
Seed stratification is a controlled process that breaks a seed’s natural dormancy by exposing it to cold, moist conditions over a specific period. For Japanese cherry blossom bonsai seeds, this step is non-negotiable. In the wild, these seeds fall from the tree in autumn, lie on the cold ground through winter, and only sprout in spring after experiencing months of low temperatures.
Without stratification, cherry blossom seeds remain dormant indefinitely. The embryo inside the seed contains chemical inhibitors that prevent germination until it senses that winter has passed. This survival mechanism ensures seedlings emerge at the right time for optimal growth. When you grow bonsai from seed, you have to replicate this natural cycle in your refrigerator.
The process requires three key ingredients:
- Cold temperature between 33°F and 41°F (1°C to 5°C) — a standard household refrigerator works perfectly
- Moisture from damp sand, peat moss, vermiculite, or paper towels to keep the seed hydrated without waterlogging
- Time measured in weeks to months, depending on the species and seed condition
| Factor | Why It Matters |
|---|---|
| Cold temperature | Activates enzymes that break down germination inhibitors |
| Moisture | Softens the seed coat and supports embryo development |
| Time duration | Ensures complete dormancy breakdown for uniform germination |
According to the American Horticultural Society, over 80% of temperate woody plant species require some form of cold stratification for optimal germination. Cherry trees are among the most sensitive, with the Japanese cherry blossom (Prunus serrulata) needing the full winter simulation to perform well.
Tip: Always stratify more seeds than you need. Germination rates for cherry blossom seeds typically range from 40% to 70%, so starting 10 to 15 seeds gives you a good chance of getting several viable seedlings.
How Long Does It Take to Stratify Japanese Cherry Blossom Bonsai Seeds?
The standard stratification period for Japanese cherry blossom bonsai seeds is 60 to 120 days, with 90 days being the most commonly recommended sweet spot. However, the exact timeline varies depending on the species, seed age, and the consistency of your cold treatment.
Seeds from the Yoshino cherry (Prunus x yedoensis) often germinate well after 60 to 80 days, while the more delicate mountain cherry (Prunus incisa) may need the full 120 days. Many experienced bonsai growers use 90 days as their baseline and adjust based on results. You should check your seeds every two weeks during stratification to monitor for early sprouting or mold.
Here is a breakdown of stratification times by common cherry species:
- Prunus serrulata (Japanese flowering cherry) — 70 to 90 days
- Prunus x yedoensis (Yoshino cherry) — 60 to 80 days
- Prunus incisa (Fuji cherry / mountain cherry) — 90 to 120 days
- Prunus subhirtella (Higan cherry) — 80 to 100 days
- Prunus sargentii (Sargent cherry) — 60 to 90 days
| Seed Condition | Recommended Stratification Time | Expected Germination Rate |
|---|---|---|
| Fresh seeds (harvested this season) | 60 to 90 days | 60% to 80% |
| 1-year-old stored seeds | 90 to 120 days | 30% to 50% |
| 2+-year-old stored seeds | 120+ days (low success) | 10% to 25% |
The Japan Bonsai Association notes that fresh cherry seeds collected directly from ripe fruit in late summer have the highest viability and require the shortest stratification period. The longer you store seeds at room temperature, the more their natural moisture content drops and the harder it becomes to break dormancy.
To maximize your success, plan to stratify your seeds in early to mid-winter so they are ready to pot in early spring. This timing aligns with the natural growth cycle of cherry trees and gives your seedlings the full growing season to establish before their first winter.
What Factors Affect the Stratification Timeline for Cherry Blossom Bonsai Seeds?
Not all cherry blossom seeds are the same. Several variables can shorten or lengthen the 60 to 120 day window. Understanding these factors helps you adjust your approach and avoid wasted time.
The most important factors are seed freshness, temperature consistency, moisture level, and genetic variation within the species. Even seeds from the same parent tree can germinate at different rates because each seed carries slightly different genetics.
Key factors that influence stratification duration:
- Seed freshness — Fresh seeds from the current season germinate faster than stored seeds. Viability drops by roughly 20% per year of dry storage.
- Temperature stability — Fluctuations above 45°F (7°C) can interrupt the cold treatment and reset the dormancy clock. Keep your refrigerator at a steady temperature.
- Moisture consistency — Seeds that dry out during stratification stop their dormancy break. Check your medium every two weeks and re-moisten if needed.
- Seed coat thickness — Some cherry species have harder seed coats that require longer cold treatment or even scarification (nicking the coat) before stratification.
- Genetic variability — Even within one batch, some seeds may germinate at 60 days while others need 120 days. This natural variation is normal.
Important: Do not open the stratification container more than once every two weeks. Each time you open it, you introduce warm air and risk temperature spikes that can delay or ruin the stratification process.
A study published in the journal Seed Science Research found that cherry seeds exposed to even a single 24-hour warm period above 50°F (10°C) during stratification required an additional 30 to 40 days of cold treatment to achieve the same germination percentage. This highlights why temperature stability is crucial when you stratify Japanese cherry blossom bonsai seeds.
If you are working with seeds from an unknown source or older stock, plan for the longer end of the range. Starting stratification early gives you flexibility to extend the cold period if the seeds are slow to respond. You can always wait longer, but you cannot undo a prematurely ended stratification.
How to Stratify Japanese Cherry Blossom Bonsai Seeds Step by Step
The stratification process is straightforward but requires attention to detail. Follow these steps to maximize your germination success.
Step 1: Prepare Your Seeds and Medium
Start with clean, viable seeds. Soak them in room temperature water for 12 to 24 hours before stratification. This softens the seed coat and hydrates the embryo.
Discard any seeds that float, as they are likely empty or non-viable.
For the stratification medium, use one of these options:
- Moist sand (builder’s sand or horticultural sand)
- Damp peat moss mixed with sand (50/50 ratio)
- Vermiculite or perlite moistened lightly
- Paper towels (less ideal, requires frequent checks)
Step 2: Mix Seeds into Medium and Seal
Mix your pre-soaked seeds into the damp medium and place them inside a zip-top plastic bag or a small container with a lid. The medium should feel like a wrung-out sponge — damp but not dripping water. Label the bag with the species name and start date.
Step 3: Refrigerate at the Correct Temperature
Place the sealed bag in the refrigerator at 33°F to 41°F (1°C to 5°C). The vegetable drawer is ideal because it has the most stable temperature and humidity. Avoid freezer compartments entirely.
Step 4: Monitor Every Two Weeks
Check your seeds every 14 days. Open the bag, inspect for mold, and check moisture levels. If the medium feels dry, mist it lightly with distilled water.
If you see mold, remove affected seeds and spray the medium with a diluted hydrogen peroxide solution (1 part 3% hydrogen peroxide to 10 parts water).
Step 5: End Stratification and Warm Up Gradually
After 60 to 120 days, remove the seeds and plant them in bonsai soil. Do not warm them suddenly. Let the bag sit at room temperature for 24 hours before opening and planting.
This gradual transition prevents shock.
Here is a quick timeline summary:
| Step | Action | Timeframe |
|---|---|---|
| 1 | Soak seeds in water | 12 to 24 hours |
| 2 | Mix into damp medium and seal | 30 minutes |
| 3 | Cold stratification in refrigerator | 60 to 120 days |
| 4 | Bi-weekly checks | Every 14 days |
| 5 | Gradual warm-up and planting | 24 hours + planting day |
What Happens If You Stratify for Too Long or Not Long Enough?
Getting the stratification duration right is a balancing act. Both under-stratification and over-stratification can cause problems, though the consequences are different.
Under-stratification (too short)
When you remove seeds before the cold treatment is complete, they remain in a dormant state. You might see low germination rates, slow and uneven sprouting, or no germination at all. In some cases, seeds that did not get enough cold treatment will germinate the following spring after experiencing a second winter in the ground.
This is why some bonsai growers use the “double stratification” method for particularly stubborn seeds.
Over-stratification (too long)
Leaving seeds in cold, moist conditions for too long can cause them to rot or grow mold. Seeds can also germinate inside the stratification bag, producing fragile sprouts that are easily damaged when you try to plant them. If you see seeds sprouting in the refrigerator, plant them immediately, even if they are delicate.
Signs of over-stratification include:
- Soft, mushy seed coats
- White or gray mold growth on the seeds or medium
- Premature sprouting inside the bag
- Sour or musty smell when opening the container
Warning: If you see mold during stratification, act immediately. Remove affected seeds, discard the contaminated medium, and replace with fresh damp sand or vermiculite. Mold spreads quickly in cold stratification and can ruin your entire batch of seeds.
To avoid both problems, treat 90 days as your target and start checking for early germination signs at day 60. Seeds that have finished stratification will often feel slightly plumper and may show a tiny crack in the seed coat where the root tip will emerge. When you see these signs, it is time to plant.
Common Mistakes When Stratifying Cherry Blossom Bonsai Seeds
Even experienced bonsai growers make mistakes with stratification. Knowing what to avoid can save you months of wasted effort. Here are the most common errors and how to fix them.
Mistake 1: Using the Wrong Temperature
A refrigerator set to 40°F is ideal, but many household refrigerators fluctuate. Use a separate refrigerator thermometer to confirm the temperature stays between 33°F and 41°F. If your fridge runs colder than 32°F, the seeds can freeze and die.
If it runs warmer than 45°F, dormancy may not break properly.
Mistake 2: Letting the Medium Dry Out
Dry seeds stop the stratification process entirely. The medium should feel damp to the touch at all times. If it dries out, re-moisten it with distilled water and add an extra 10 to 20 days to your stratification timeline to compensate for the interruption.
Mistake 3: Overcrowding Seeds in One Bag
Placing too many seeds in a single bag creates competition for moisture and increases the risk of mold spreading. Keep batches to 15 to 20 seeds per bag and use enough medium to cover the seeds completely.
Mistake 4: Skipping the Pre-Soak
Dry seeds placed directly into cold stratification take much longer to respond. A 12 to 24 hour soak in room temperature water before refrigeration softens the seed coat and speeds up the entire process.
Mistake 5: Forgetting to Label
If you stratify multiple species or start batches at different times, unlabeled bags become impossible to track. Always label each bag with the species, source, and start date using a permanent marker or waterproof label.
To help you avoid these pitfalls, here is a quick checklist before you start:
- Have you tested your refrigerator temperature with a thermometer?
- Is your stratification medium pre-moistened to the correct dampness?
- Have you soaked your seeds for 12 to 24 hours in water?
- Are your bags labeled with species and date?
- Do you have a calendar reminder set for your first two-week check?
What to Do After Stratification Is Complete
Once your 60 to 120 day cold treatment is finished, the real work begins. Proper post-stratification care determines whether your seeds transform into healthy bonsai seedlings or fail at the last stage.
Planting the Seeds
Fill a shallow bonsai seed tray or small pots with a well-draining soil mix. A standard mix of 50% akadama, 25% pumice, and 25% organic potting compost works well for cherry seedlings. Plant each seed about 1/4 inch deep and cover lightly with soil.
Space seeds at least 1 inch apart to give roots room to grow.
Watering and Light
Water the soil thoroughly after planting and keep it consistently moist but not waterlogged. Place the tray in a bright location with indirect sunlight. Direct sun can scorch tender new sprouts.
A windowsill with morning sun and afternoon shade is ideal for the first few weeks.
Here are the key post-stratification care steps:
- Temperature — Keep seedlings at 60°F to 70°F (15°C to 21°C) during the day and slightly cooler at night
- Humidity — Cover the tray with a clear plastic dome or plastic wrap to maintain humidity until sprouts appear
- Airflow — Remove the cover for 30 minutes daily to prevent fungal growth and strengthen the seedlings
- Fertilizer — Do not fertilize until the first set of true leaves appears, then use a diluted liquid bonsai fertilizer at half strength
- Thinning — Once seedlings have two sets of true leaves, remove the weakest ones to leave only the strongest plants
Tip: Cherry blossom seedlings grow slowly in their first year. Do not expect rapid height growth. Focus on developing a strong root system and a straight trunk. By the second year, you can begin basic bonsai shaping techniques like wiring and pruning.
Seedlings typically emerge 2 to 4 weeks after planting, depending on the species and growing conditions. Once the seedlings reach 4 to 6 inches tall, you can transplant each one into its own small bonsai pot. This is also the time to begin root pruning and shaping for the bonsai form.

Frequently Asked Questions
Can I stratify Japanese cherry blossom bonsai seeds in the freezer?
No, the freezer is too cold. Cherry blossom seeds need temperatures between 33°F and 41°F (1°C to 5°C). Freezing temperatures below 32°F (0°C) can kill the embryo and ruin the seeds.
Always use the refrigerator, not the freezer.
Do I need to scarify cherry blossom seeds before stratification?
Generally, no. Most Japanese cherry blossom species do not require scarification because their seed coats are not extremely hard. However, if you have older seeds or seeds from a species with a very tough coat, lightly nicking the seed with a nail file can improve water absorption and speed up stratification.
Can I stratify cherry blossom seeds in the garden over winter instead of the refrigerator?
Yes, this is called natural stratification. Plant the seeds in a protected outdoor seed bed in late autumn and let winter temperatures do the work. The success rate is often lower due to temperature swings, pests, and inconsistent moisture, but it can work if you live in a region with cold winters.
How do I know when stratification is finished?
Seeds are ready when they feel slightly plumper, show a tiny crack in the seed coat, or have a small white root tip emerging. You can also test by squeezing gently — a firm seed is still dormant, while a slightly soft seed has likely completed stratification.
What is the success rate for stratified cherry blossom bonsai seeds?
With proper technique, expect 40% to 70% germination for fresh seeds. Older seeds drop to 10% to 30%. Using fresh seeds, maintaining stable cold temperatures, and keeping the medium consistently damp will give you the highest success rate when you stratify Japanese cherry blossom bonsai seeds.
Final Thoughts
Stratifying Japanese cherry blossom bonsai seeds for the correct 60 to 120 day period is the single most important step in growing a bonsai from seed. Stick to the right temperature range, keep your medium consistently damp, and check your seeds every two weeks. With patience and proper technique, you will be rewarded with healthy seedlings ready to begin their bonsai journey.
Start your stratification in early winter, and by spring you will have sprouts emerging to shape and train for years to come.