How to Prepare Cantaloupe Seeds for Planting (Easy Steps)
Preparing cantaloupe seeds for planting boosts germination rates and gives your seedlings a strong start. This guide walks you through every step, from harvesting to storage, so you can grow sweet, healthy cantaloupes in your garden.
Simply put, preparing cantaloupe seeds involves cleaning, fermenting (to remove the gel coating), drying, and testing viability before planting. This simple routine prevents disease, improves germination, and ensures only the strongest seeds go into the soil.
Key Takeaways
- Preparing cantaloupe seeds for planting removes natural germination inhibitors and pathogens.
- Fermenting seeds for 24–48 hours mimics natural decomposition and boosts germination by up to 20%.
- Proper drying to 8–10% moisture content prevents mold during storage.
- Always test viability with a paper towel method before planting to save time and space.

What You Need to Prepare Cantaloupe Seeds
Before you begin, gather a few basic kitchen and gardening tools. Most items are already in your home. Having everything ready makes the process smooth and mess-free.
- Ripe cantaloupe (preferably heirloom or open-pollinated)
- Sharp knife and cutting board
- Fine-mesh strainer or colander
- Glass jar or bowl
- Paper towels or coffee filters
- Clean kitchen towel or paper plate
- Sealed envelope or glass jar for storage
- Ziplock bag and paper towel for viability test
Tip: Use seeds from a fully ripe cantaloupe – the seeds should be dark tan or brown, not white or pale. Immature seeds rarely germinate.
Why Proper Seed Preparation Matters
Cantaloupe seeds are encased in a slippery, gelatinous coating called the placental membrane. This coating contains germination inhibitors that prevent seeds from sprouting inside the fruit. If you plant seeds without removing this layer, germination slows and mold can develop.
According to the University of Georgia Extension, properly cleaned and fermented melon seeds germinate 25% faster than untreated seeds.
Preparation also eliminates pathogens like bacterial fruit blotch and fungi that can survive on the seed coat. The American Seed Trade Association reports that seed-borne diseases reduce seedling survival by up to 30% in untreated batches. Taking 20 extra minutes to prepare your seeds can therefore make the difference between a full patch and a disappointing harvest.
| Factor | Untreated Seeds | Prepared Seeds |
|---|---|---|
| Germination rate | 50–70% | 85–95% |
| Disease risk | High | Low |
| Storage life | 6–12 months | 3–5 years |
Preparation also removes any pulp that can attract insects and cause rot once the seeds are in the ground. A clean seed is a healthy seed.
Step 1: Harvesting and Cleaning the Seeds
Cut your ripe cantaloupe in half and scoop out the central seed mass with a spoon. Place the seeds and the surrounding pulp into a bowl. Don’t worry about separating them yet – the pulp is part of the fermentation process.
- Cut the cantaloupe lengthwise and open it.
- Scrape the entire seed mass into a glass bowl or jar.
- Add an equal amount of room-temperature water to the bowl.
- Swirl gently to loosen the pulp from the seeds.
- Pour the mixture through a fine-mesh strainer and rinse with cool water.
Important: Do not use hot water – it can kill the embryo inside the seed. Always use water between 60°F and 80°F (15–27°C).
After rinsing, you should see mostly clean seeds with some remaining fibers. If you plan to skip fermentation, you can proceed to drying now. However, fermentation is highly recommended for the best germination results.
Step 2: Fermenting the Seeds (Optional but Recommended)
Fermentation mimics the natural process seeds undergo when a fruit rots on the ground. It dissolves the gelatinous coating, kills surface pathogens, and even separates viable seeds from non-viable ones (viable seeds sink, dead ones float).
- Place rinsed seeds back into a clean jar with enough water to cover them by an inch.
- Cover the jar with a paper towel or cheesecloth secured with a rubber band.
- Keep the jar at room temperature (70–75°F / 21–24°C) for 24 to 48 hours.
- Stir the mixture once or twice per day to prevent mold on top.
- After 24 hours, check for a frothy layer – that’s normal and indicates fermentation is working.
When to stop: Once you see the seeds sink to the bottom and the water looks cloudy, fermentation is complete. Do not leave seeds fermenting longer than 48 hours – they can start sprouting in the jar.
| Fermentation Time | Result | Recommendation |
|---|---|---|
| 12 hours | Partial gel removal | Not enough |
| 24 hours | Most gel removed, good pathogen kill | Ideal for warm climates |
| 48 hours | Full cleaning, maximum germination boost | Best overall |
After fermentation, pour off the water and floating debris. Rinse the remaining seeds thoroughly in a strainer. They should feel clean, not slippery.
Step 3: Drying the Seeds Properly
Drying is the most critical step for long-term storage. Seeds with too much moisture will rot or grow mold. The goal is to reduce moisture content to around 8–10%.
You can test by bending a seed – a properly dried seed will snap, not bend.
- Spread the clean, moist seeds on a paper towel, coffee filter, or screen in a single layer.
- Place them in a warm, dry, well-ventilated area away from direct sunlight.
- Flip or stir the seeds daily to ensure even drying.
- Let seeds dry for 5–7 days, depending on humidity.
- Check for dryness daily – if any seed feels cool or soft, continue drying.
Warning: Never dry seeds in an oven, microwave, or dehydrator set above 95°F (35°C). High heat kills the embryo. Air drying at room temperature is safest.
Once fully dry, the seeds will be hard, brittle, and slightly lighter in color. A quick tip from the Seed Savers Exchange: if you press a seed with your fingernail and it leaves a mark, it’s not dry enough. Wait another day or two.
Step 4: Testing Seed Viability
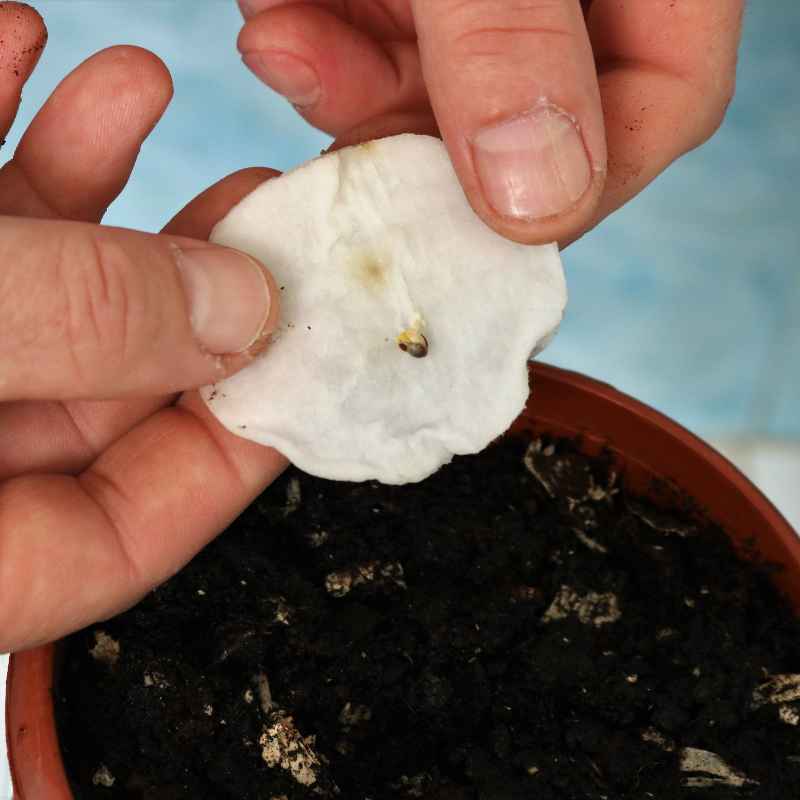
Before planting all your seeds, run a simple viability test. This saves you from wasting soil and time on dead seeds. The paper towel method takes 7–10 days and gives you a clear germination percentage.
- Moisten a paper towel so it’s damp but not dripping.
- Place 10 seeds on one half of the towel, spaced apart.
- Fold the other half over the seeds and seal inside a ziplock bag.
- Keep the bag in a warm spot (75–85°F / 24–29°C).
- Check after 7 days – count how many seeds have sprouted a root.
Tip: Multiply the number of sprouted seeds by 10 to get your germination percentage. For example, 8/10 seeds sprouted = 80% viability. Aim for at least 75% before planting directly.
If germination is below 60%, consider buying new seeds or repeating the preparation steps more carefully. Many gardeners get 90%+ germination after proper fermentation.
Step 5: Storing Seeds Until Planting
Once dry and tested, store your seeds in a cool, dark, dry place. Proper storage keeps seeds viable for 3–5 years. Temperature and humidity are the main enemies.
| Storage Container | Pros | Cons |
|---|---|---|
| Glass jar with tight lid | Moisture-proof, reusable | Can break if dropped |
| Paper envelope inside a tin | Breathable, cheap | Less moisture protection |
| Vacuum-sealed bag | Best long-term storage | Need a vacuum sealer |
Add a silica gel packet to the container to absorb any residual moisture. Label the container with the seed variety and date harvested. Store it in your refrigerator or a cool basement (35–50°F / 2–10°C).
The Cornell University Department of Horticulture notes that refrigerated seeds maintain viability nearly three times longer than seeds stored at room temperature.
Common Mistakes to Avoid
Even experienced gardeners slip up sometimes. Here are the most frequent errors when preparing cantaloupe seeds for planting :
- Starting with immature seeds: Seeds from underripe cantaloupe have thin coats and low energy reserves. Always use fully ripe fruits.
- Skipping fermentation: Many people skip this step to save time, but it removes natural germination inhibitors. The result is slower, uneven sprouting.
- Over-drying or under-drying: Seeds that snap too easily are over-dried and may die; seeds that bend are under-dried and will rot.
- Storing without labeling: You might think you’ll remember the variety, but months later you’ll be guessing. Always write the name and date.
- Not testing viability: Planting a whole tray of seeds only to discover 30% germination is a waste of time and space. Test first.
Important: If you accidentally leave seeds fermenting for more than 3 days, they may start sprouting in the jar and will no longer be viable for storage. Use them immediately or discard.

Frequently Asked Questions
Do I have to ferment cantaloupe seeds?
No, but it’s highly recommended. Fermentation boosts germination rates, eliminates pathogens, and makes seeds easier to separate from pulp. Without fermentation, germination may drop by 10–20%.
How long do prepared cantaloupe seeds last in storage?
When dried to the proper moisture level and stored in a cool, dark place, cantaloupe seeds remain viable for 3–5 years. Refrigeration can extend that to 5–7 years.
Can I plant cantaloupe seeds directly from a store-bought fruit?
Yes, but you must prepare them first. Remove the gel coating, ferment, dry, and test. Store-bought cantaloupe may also be a hybrid, so the resulting fruit might not taste exactly like the parent.
Should I soak cantaloupe seeds before planting?
Soaking for 12–24 hours can speed up germination by softening the seed coat. However, if you’ve already fermented and dried your seeds, soaking adds little benefit. Plant directly in warm soil instead.
What temperature do cantaloupe seeds need to germinate?
Cantaloupe seeds germinate best when soil temperatures are between 75°F and 95°F (24–35°C). At temperatures below 60°F (15°C), seeds may rot. Use a soil thermometer to check before planting.
Final Thoughts
Preparing cantaloupe seeds for planting is a straightforward process that greatly improves your gardening success. By cleaning, fermenting, drying, and testing your seeds, you ensure strong, healthy seedlings that can withstand disease and produce sweet fruit. Take the time to prepare your seeds properly, and you’ll enjoy a better harvest for years to come.