
To prevent plant shock, handle roots gently and keep the root ball intact when transplanting. Move plants during cool, overcast weather and water them thoroughly before and after the move. Prepare the new spot in advance, and provide temporary shade for a few days to help your plant adjust without stress.
Hello, fellow gardeners! It’s Md Saiful Islam here. Bringing a new plant home or moving a beloved one to a better spot in your garden is always exciting. You have the perfect location picked out, and you can already picture it thriving. But sometimes, after the move, your once-happy plant starts to look sad, wilted, and stressed. This common problem is called transplant shock, and it can be discouraging for any gardener.
Don’t worry, it happens to the best of us! The good news is that plant shock is almost entirely preventable. You don’t need a special green thumb, just a little know-how and a gentle touch. In this guide, I’ll walk you through the simple, proven steps to move your plants without the drama. We’ll cover everything from preparing for the move to post-planting care, ensuring your green friends settle into their new homes happily and healthily.
What Exactly Is Plant Shock?
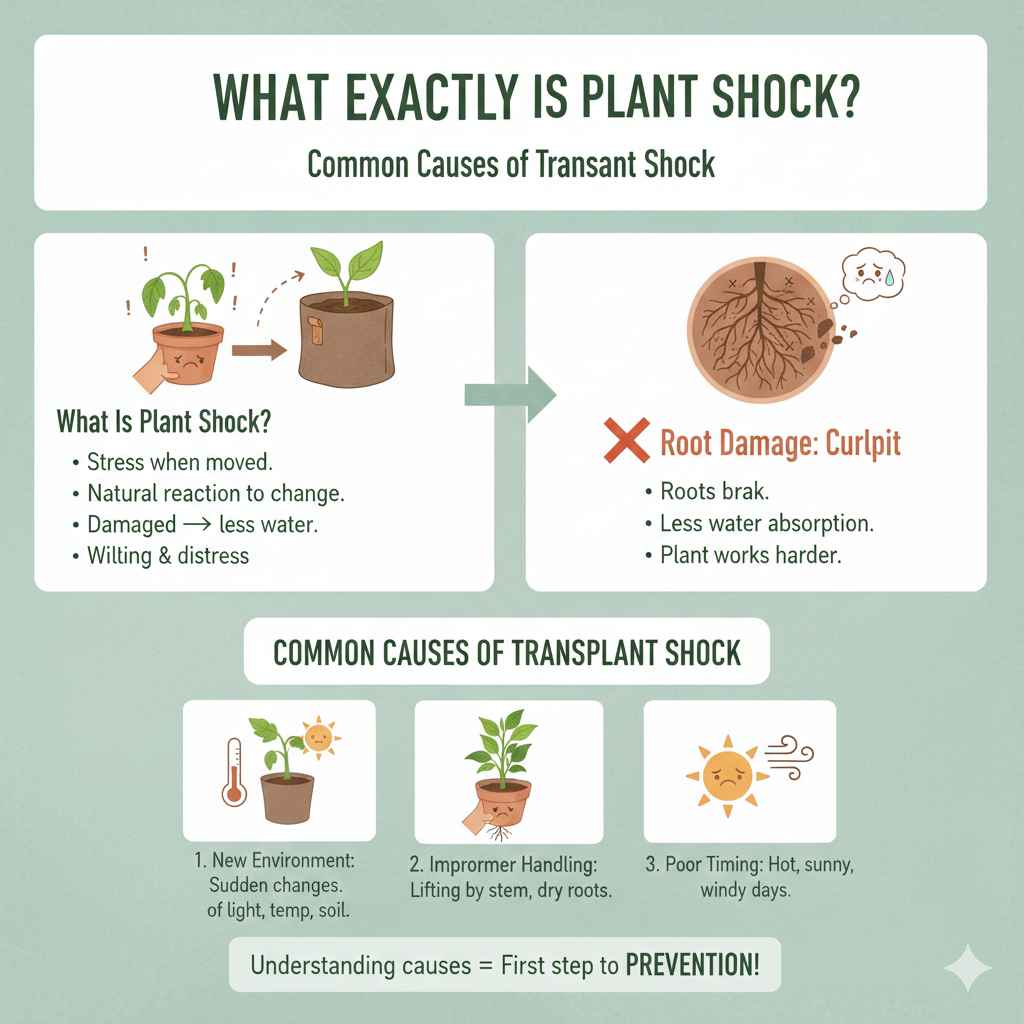
Think of plant shock, or transplant shock, as the stress a plant feels when it’s moved from one location to another. Just like humans can feel overwhelmed after moving to a new house, plants feel stressed when their environment changes. This is a natural reaction to the disturbance, especially to their delicate root system.
When you dig up a plant, you inevitably damage some of its roots. These roots are vital; they absorb the water and nutrients the plant needs to survive. With a smaller, less effective root system, the plant struggles to get enough water to its leaves, leading to the classic signs of wilting and distress. The plant suddenly has to work much harder to stay alive while also trying to grow new roots and adapt to new soil, light, and temperature conditions.
Common Causes of Transplant Shock
Understanding the causes is the first step to prevention. Plant shock is usually a combination of a few key factors:
- Root Damage: This is the biggest culprit. Even with careful digging, tiny root hairs that are essential for water absorption get broken or stripped away. The more roots are damaged, the more severe the shock.
- New Environment: A sudden change in temperature, sunlight exposure, humidity, or soil type can be a shock to a plant’s system. It’s like moving from a cozy, humid greenhouse to a dry, sunny windowsill without any adjustment period.
- Improper Handling: Lifting a plant by its stem, letting the roots dry out in the air, or compacting the soil too tightly around it can all contribute to stress.
- Poor Timing: Transplanting on a hot, sunny, or windy day puts immense pressure on a plant. The plant loses water through its leaves (a process called transpiration) much faster than its damaged roots can absorb it.
How to Recognize the Signs of Plant Shock
Your plant will give you clear signals if it’s experiencing transplant shock. It’s important to watch for these signs in the first few days and weeks after moving it. The sooner you spot them, the better you can help your plant recover.
Common symptoms include:
- Wilting or Drooping: This is the most common sign. The leaves and stems look limp and tired because they aren’t getting enough water.
- Yellowing Leaves (Chlorosis): Leaves may turn yellow and eventually drop off as the plant sheds parts of itself to conserve energy and water.
- Leaf Scorch: The edges of the leaves may look brown, dry, and crispy, especially if the plant is getting too much sun.
- Stunted Growth: The plant may stop producing new leaves or flowers as it diverts all its energy to repairing its roots.
- Leaf Drop: Don’t panic if a few leaves fall off, but significant leaf loss is a clear sign of stress.
Sometimes, these symptoms can be confused with other issues like overwatering or underwatering. The table below can help you tell the difference.
| Symptom | Likely Transplant Shock If… | Could Be Another Issue If… |
|---|---|---|
| Wilting Leaves | It happens within a few days of moving the plant, and the soil is moist. | The soil is bone dry (underwatering) or soaking wet (overwatering/root rot). |
| Yellowing Leaves | Lower leaves turn yellow and drop off first after a recent transplant. | New leaves are yellow (nutrient deficiency) or there are yellow spots all over (pest/disease). |
| Stunted Growth | The plant was growing fine and then stopped right after being moved. | The plant has been in the same pot for years (root-bound) or the season is changing (dormancy). |
The Ultimate Guide to Preventing Plant Shock: Step-by-Step
Now for the fun part! Let’s get our hands dirty and learn how to move plants the right way. I’ve broken this down into three simple phases: before, during, and after the transplant. Following these steps will give your plants the best possible chance of a smooth, stress-free transition.
Phase 1: Before You Transplant
Preparation is everything. What you do before you even touch the plant can make the biggest difference in preventing plant shock.
1. Pick the Right Time
Timing is critical. Avoid transplanting in the middle of a hot, sunny day. The intense sun and heat will cause the plant to lose water too quickly.
- Best Time of Day: Transplant on an overcast day, in the early morning, or in the evening when the sun is not as strong. This gives the plant several hours to adjust before facing direct heat.
- Best Season: Spring and fall are generally the best seasons for transplanting. The cooler temperatures and more frequent rain help plants establish new roots without the stress of summer heat or winter cold.
2. “Harden Off” Your Plants
If you’re moving a plant from indoors to outdoors (or from a protected greenhouse to the garden), you must “harden it off.” This process gradually acclimatizes the plant to the new, harsher conditions of the outdoors, like direct sun, wind, and temperature swings.
Here’s a simple 7-10 day hardening off schedule:
- Days 1-2: Place the plant outside in a shady, protected spot for just 1-2 hours. Bring it back inside.
- Days 3-4: Increase its time outside to 3-4 hours, introducing it to a little bit of gentle morning sun.
- Days 5-6: Leave it out for 5-6 hours, with a bit more direct sunlight. Make sure it stays watered.
- Days 7-9: Let the plant stay outside for most of the day, bringing it in only at night.
- Day 10+: The plant can now stay outside overnight, provided there is no risk of frost. It is ready for its new home in the garden.
For more detailed information, Penn State Extension offers an excellent guide on the hardening off process.
3. Prepare the New Home
Have the new spot completely ready before you dig up the plant. You want to minimize the time the plant’s roots are exposed to the air.
- Dig the Hole First: The new hole should be about twice as wide as the plant’s root ball and just as deep. A wider hole gives the roots room to spread out into loosened soil.
- Amend the Soil: Mix some compost or other organic matter into the soil you removed from the hole. This adds valuable nutrients and improves soil structure, helping the new roots get established. Avoid adding synthetic fertilizer directly into the planting hole, as it can burn the delicate roots.
4. Water the Plant Thoroughly
Give your plant a deep watering a day or two before the move. This ensures the plant is fully hydrated, which helps it withstand the stress of transplanting. It also helps the soil cling to the root ball, keeping it intact during the move.
Phase 2: During the Transplant
This is the moment of truth. The key here is to be quick, but gentle. Your goal is to disturb the roots as little as possible.
- 1. Dig with Care
- Start digging a wide circle around the plant, well away from the main stem. You want to get as much of the root ball as you can. For a plant in a pot, gently squeeze the sides of the container to loosen the soil, then tip it upside down, supporting the plant with your hand, and let it slide out.
- 2. Keep the Root Ball Intact
- The ball of soil around the roots is precious! It protects the fine root hairs. Do everything you can to keep it together. If the plant is in the ground, use a spade or shovel to lift the entire root ball out at once. Try not to shake or knock off the soil.
- 3. Move Quickly to the New Spot
- Don’t leave the plant lying on the ground with its roots exposed to the sun and wind. Carry it immediately to its new, pre-dug hole. If you have to move it a longer distance, place the root ball on a tarp or in a wheelbarrow to protect it.
- 4. Plant at the Correct Depth
- This is a common mistake that can cause big problems. Place the plant in the new hole so that the top of its root ball is level with or slightly above the surrounding ground level. You can lay your shovel handle across the hole to check the height. Planting too deep can suffocate the roots, while planting too high can cause them to dry out.
- 5. Backfill the Hole Gently
- Fill the hole with the amended soil you set aside. Gently firm the soil around the root ball with your hands to eliminate large air pockets. Do not stomp on the soil, as this can compact it and damage the roots.
Phase 3: After the Transplant
Your plant is in its new home, but your job isn’t done yet. Proper aftercare is essential for helping the plant recover and start thriving.
- 1. Water Deeply and Immediately
- As soon as the plant is in the ground, give it a long, deep drink of water. This helps settle the soil around the roots, removing any remaining air pockets. It also provides much-needed hydration.
- 2. Provide Temporary Shade
- Even if the plant is a sun-lover, give it some temporary shade for the first 3-5 days. This reduces water loss through the leaves and gives the roots a chance to start recovering without the added stress of intense sunlight. You can use a shade cloth, a piece of cardboard, an old bedsheet propped up on stakes, or even a lawn chair.
- 3. Hold Off on the Fertilizer
- Don’t fertilize a newly transplanted plant for at least 2-4 weeks. Stressed roots are sensitive and can be “burned” by the salts in fertilizer. The plant needs to focus its energy on growing new roots, not new leaves. Wait until you see signs of new, healthy growth before you consider feeding it.
- 4. Mulch is Your Friend
- Apply a 2-3 inch layer of organic mulch (like shredded bark, compost, or straw) around the base of the plant, but be sure to keep it a few inches away from the stem. Mulch helps retain soil moisture, regulates soil temperature, and suppresses weeds that compete for water and nutrients.
- 5. Prune Sparingly, If at All
- It might seem like a good idea to prune back the plant to reduce the number of leaves the roots need to support. However, leaves are where the plant makes its food through photosynthesis. Removing too many can hinder its ability to produce the energy it needs to recover. Only prune away any branches that were broken or damaged during the move.
The University of Maryland Extension provides a fantastic overview of these aftercare steps, particularly for larger plants like trees and shrubs.
At-a-Glance Transplanting Checklist
Here is a simple table to keep on hand for your next transplanting project.
| Stage | Key Action | Why It Matters |
|---|---|---|
| Before | Choose a cool, overcast day. | Reduces water loss and stress from heat. |
| Before | Water the plant 24 hours in advance. | Hydrates the plant and helps the root ball hold together. |
| Before | Prepare the new hole completely. | Minimizes the time roots are exposed to air. |
| During | Keep the root ball as intact as possible. | Protects the delicate root hairs responsible for water absorption. |
| During | Plant at the same depth it was growing before. | Prevents roots from suffocating (too deep) or drying out (too shallow). |
| After | Water thoroughly immediately after planting. | Settles soil, removes air pockets, and provides critical hydration. |
| After | Provide temporary shade for a few days. | Reduces stress on the leaves while the roots recover. |
| After | Do not fertilize for several weeks. | Prevents burning of sensitive, recovering roots. |

Frequently Asked Questions (FAQ)
1. How long does transplant shock last?
Transplant shock can last anywhere from a few days to several weeks, or even a full season for larger plants like trees and shrubs. For most small plants and perennials, you can expect them to look a bit sad for the first week or two. As long as you see gradual improvement, you’re on the right track.
2. Can a plant recover from severe transplant shock?
Yes, plants are incredibly resilient! As long as the plant has some healthy roots and you provide proper aftercare (consistent water, shade, no fertilizer), it has a good chance of bouncing back. Be patient. If you see tiny new leaves or buds forming, that’s a great sign of recovery.
3. Should I fertilize a plant in shock?
No, absolutely not. Fertilizing a stressed plant is like asking someone with the flu to run a marathon. The plant needs to focus all its energy on regrowing its root system. Fertilizers push for top growth, which further stresses the plant. Wait until you see consistent, new growth before you resume a regular feeding schedule.
4. Is it better to transplant in the morning or evening?
Both are excellent choices. The goal is to avoid the intense heat and sun of midday. Transplanting in the early morning gives the plant the whole day to settle in before the cooler night. Transplanting in the evening gives it the entire night to recover before facing its first full day of sun.
5. What is the best way to move a large, established plant?
Moving a large plant is a bigger challenge. The key is to get a much larger root ball. You may need to start digging several feet away from the base. It often requires two people and a tarp or wheelbarrow to lift and move it without it falling apart. For very large or valuable shrubs or trees, consider consulting a professional arborist.
6. Do all plants get transplant shock?
While all plants can experience some level of stress, some are much more prone to it than others. Plants with deep taproots (like carrots or poppies) hate being moved. Young, small plants generally transplant much more easily than older, established ones. Succulents and other hardy plants often handle the move with very little fuss.
7. Can I use a root stimulator or vitamin B1 to prevent shock?
Many gardeners use root stimulating products, which often contain hormones that encourage root growth. While research on their effectiveness can be mixed, they generally don’t harm the plant and may help encourage faster root development. However, they are not a substitute for proper transplanting technique. Gentle handling and correct watering are far more important.
Conclusion: A Happy Move for Your Green Friends
Transplanting doesn’t have to be a stressful experience for you or your plants. By understanding what causes plant shock and following these simple, proven techniques, you can move your plants with confidence. Remember the golden rules: be gentle with the roots, time your move wisely, and provide attentive aftercare.
Your plant may still droop a little bit for a day or two, and that’s okay. It’s just adjusting. But with the right preparation and care, you’ll see it perk up quickly and begin to thrive in its new home. Happy gardening, and may all your transplants be successful ones!