To fix root rot in house plants, remove affected roots and repot in fresh, well-draining soil. Ensure proper watering habits to prevent recurrence.
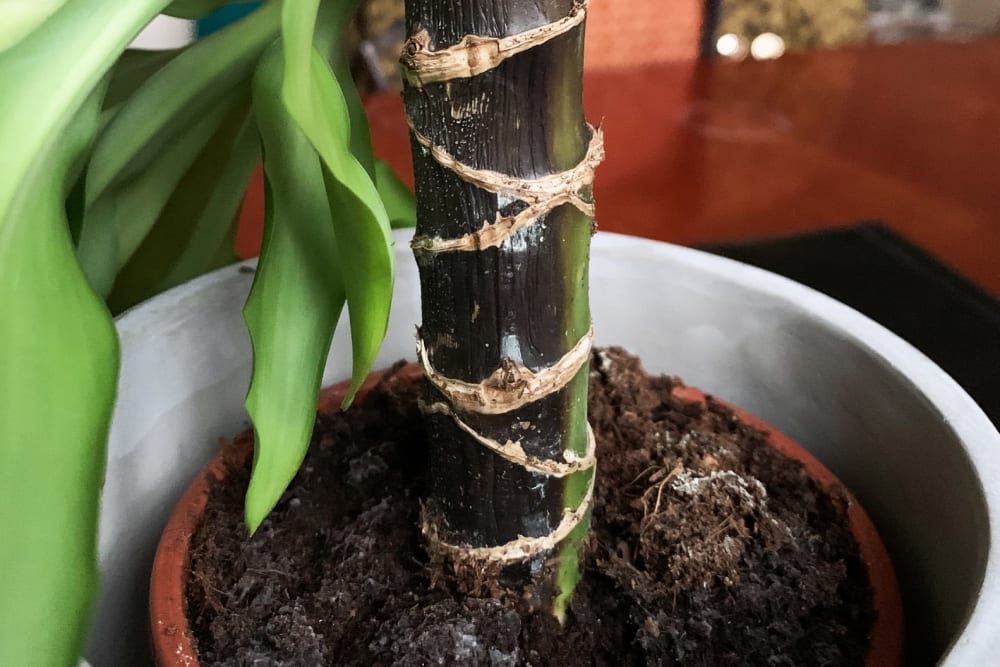
Root rot is a common issue that can severely damage house plants, often caused by overwatering and poor drainage. Identifying root rot early is crucial to save your plant. Brown, mushy roots and yellowing leaves are telltale signs. The first step in treating root rot involves removing the plant from its pot and trimming away all affected roots with sterilized scissors.
Repot the plant in fresh, well-draining soil and a clean pot to prevent re-infection. Adjust your watering schedule to allow the soil to dry between waterings, ensuring the plant’s roots have adequate air circulation. This proactive approach helps in maintaining healthy house plants.
Identifying Root Rot
Root rot is a common problem for houseplants. It is important to identify it early. This condition can severely damage or even kill your plants. Knowing the signs can help you take action quickly.
Common Symptoms
Look for these common symptoms to identify root rot:
- Yellowing leaves
- Wilting even with adequate water
- Mushy or blackened roots
- Foul odor from the soil
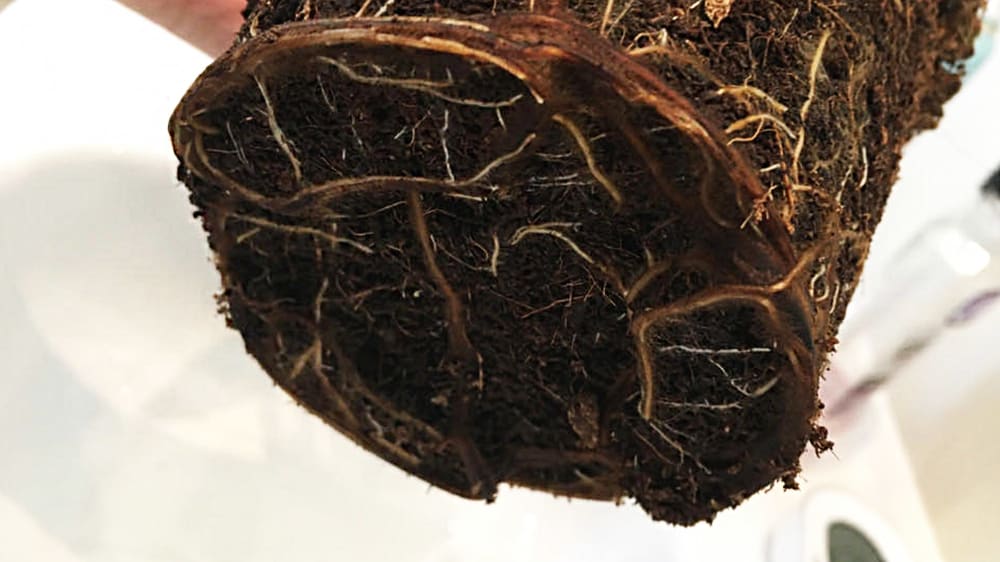
If you see these symptoms, check your plant’s roots. Healthy roots are firm and white. Rotted roots are soft and brown.
Why Root Rot Occurs
Root rot occurs because of overwatering and poor drainage. When soil is too wet, roots can’t get oxygen. This causes them to rot.
| Cause | Effect |
|---|---|
| Overwatering | Roots suffocate and rot |
| Poor drainage | Waterlogged soil |
| Compact soil | Prevents air from reaching roots |
To prevent root rot, use well-draining soil. Water your plants only when the topsoil is dry. Ensure pots have drainage holes. Make sure excess water can escape.
:max_bytes(150000):strip_icc()/treat-root-rot-houseplants-5223283-hero-aa83691aaa4f4f44855f8f797f22fe1d.jpg)
Credit: www.thespruce.com
Immediate Actions
Root rot can be a serious issue for house plants. Taking immediate actions is vital to save your plant. These steps will help you address the problem effectively and efficiently.
Isolating The Plant
First, isolate the affected plant to prevent the spread of rot. Move the plant away from healthy plants. This step is crucial for stopping the infection.
Place the plant in a well-ventilated area. Ensure it gets indirect sunlight. Proper air circulation helps in drying out the rot.
Remember: Root rot is contagious. Keep infected plants separated until they recover.
Preparing A Clean Workspace
Next, set up a clean workspace. A clean area is essential for treating root rot. Gather all necessary tools before you start.
Here is a list of items you will need:
- Clean scissors or pruning shears
- Fresh potting mix
- Disinfectant solution
- New pot with drainage holes
Disinfect your tools to avoid spreading the infection. You can use a simple bleach solution. Mix one part bleach with nine parts water.
Lay down newspaper or a plastic sheet. This will help contain any mess. Make sure your workspace is well-lit and comfortable.
| Item | Purpose |
|---|---|
| Clean scissors or pruning shears | Cut away infected roots |
| Fresh potting mix | Provide new, healthy soil |
| Disinfectant solution | Clean tools and prevent spread |
| New pot with drainage holes | Ensure proper water drainage |
Having a clean workspace ensures a smooth treatment process. It helps in keeping the infection under control.
Removing Affected Roots
Root rot is a common issue for house plants. It can kill plants quickly. Removing affected roots is crucial to save your plant. This section will guide you through the process step-by-step.
Sterilizing Tools
Before you start, make sure to sterilize your tools. This prevents the spread of disease. Use a sharp knife or pruning shears. Follow these steps:
- Clean tools with soap and water.
- Wipe tools with rubbing alcohol.
- Let tools air dry completely.
Pruning Techniques
Now that your tools are clean, you can begin pruning. Follow these simple techniques:
- Gently remove the plant from its pot.
- Shake off excess soil to expose roots.
- Look for roots that are brown or mushy.
- Use your sterilized tools to cut away affected roots.
- Make clean cuts to avoid further damage.
After removing the bad roots, inspect the healthy ones. Healthy roots are firm and white. Replant your house plant in fresh soil. Make sure the pot has good drainage.
Repotting The Plant
Root rot can devastate house plants. Repotting is a key solution. This process refreshes the plant and removes damaged roots. Repotting ensures your plant gets a healthy environment.
Choosing The Right Soil
Healthy soil is essential for your plant. Select soil that drains well. Avoid heavy, water-retentive soils. Mix in perlite or sand to improve drainage. A balanced mix of organic matter and minerals is ideal.
| Soil Type | Drainage |
|---|---|
| Cactus mix | High |
| Potting mix with perlite | Moderate |
| Garden soil | Poor |
Selecting An Appropriate Pot
The right pot is crucial. Ensure it has drainage holes. Pots without holes cause water to stagnate. Choose a pot slightly larger than the current one. This gives roots space to grow.
- Plastic pots: Lightweight and affordable.
- Terracotta pots: Breathable but heavier.
- Ceramic pots: Decorative but fragile.
Clean the pot before use. This removes any pests or diseases. Use a mild bleach solution for cleaning.
- Fill the bottom with a layer of gravel.
- Add your chosen soil mix.
- Place the plant in the center.
- Fill around the roots with soil.
- Water lightly to settle the soil.
Repotting helps in rejuvenating the plant. Follow these steps carefully for best results.
Improving Drainage
Root rot is a common issue in house plants, and one crucial step to fix it is improving drainage. Proper drainage ensures that water does not sit at the roots, which can lead to rot. Here are some effective methods to enhance drainage in your plant pots.
Adding Gravel Or Sand
Adding gravel or sand to your potting mix can help improve drainage. Here’s how to do it:
- Mix gravel or coarse sand into the soil.
- Use a ratio of one part gravel to four parts soil.
- Ensure the gravel is clean and free of chemicals.
This mixture allows water to flow through the soil, reducing the risk of root rot.
Using Pots With Drainage Holes
Pots with drainage holes are essential for preventing root rot. These holes allow excess water to escape. Follow these steps:
- Choose a pot with multiple drainage holes.
- Place a mesh screen over the holes to prevent soil loss.
- Ensure the pot is elevated slightly to allow water to drain freely.
Pots with drainage holes are crucial for healthy plant roots. They prevent water from pooling at the bottom.
By incorporating these methods, you can significantly reduce the risk of root rot in your house plants.
Credit: www.patchplants.com
Watering Practices
Proper watering practices are crucial to prevent and fix root rot in house plants. Overwatering or underwatering can create an unhealthy environment for your plants. Learning the right watering techniques helps in maintaining vibrant and healthy plants.
How Much To Water
The amount of water your plant needs depends on its type and size. Here are some general guidelines:
- Small plants: Use about 1/4 cup of water.
- Medium plants: Use about 1/2 cup of water.
- Large plants: Use about 1 cup of water.
Always check the soil moisture before watering. Insert your finger about an inch into the soil. If it feels dry, it’s time to water. If it feels moist, wait a few days.
Frequency Of Watering
The frequency of watering varies with the plant type and environment. Here’s a simple table to guide you:
| Plant Type | Watering Frequency |
|---|---|
| Succulents | Every 2-3 weeks |
| Ferns | Once a week |
| Tropical Plants | Every 5-7 days |
Adjust the frequency based on the season. Plants may need more water in summer and less in winter. Always monitor the soil moisture to avoid root rot.
Preventing Future Root Rot
Preventing root rot in your house plants is crucial for their health. By taking simple steps, you can ensure your plants thrive. This section will guide you on monitoring soil moisture and conducting regular root checks.
Monitoring Soil Moisture
Keeping soil moisture levels in check is vital. Too much water can lead to root rot. Use a moisture meter to gauge soil dampness. Insert the meter into the soil and check the reading. Water your plant only when the meter shows dry soil.
Another method is the finger test. Stick your finger about an inch into the soil. If the soil feels dry, it’s time to water. If it’s still moist, wait a few more days.
Ensure your pots have drainage holes. This allows excess water to escape, preventing waterlogged soil.
| Tool | How to Use |
|---|---|
| Moisture Meter | Insert into soil and read the moisture level. |
| Finger Test | Stick your finger into soil to feel moisture. |
Regular Root Checks
Inspect your plant’s roots every few months. Carefully remove the plant from its pot. Look for signs of root rot, such as mushy or dark roots. Healthy roots are firm and white.
If you spot unhealthy roots, trim them with clean scissors. Remove any dead or rotting roots. This helps the plant recover and grow stronger.
Repot your plant in fresh soil after trimming the roots. Choose a pot with good drainage to prevent future problems.
- Check roots every few months
- Trim unhealthy roots immediately
- Use a pot with drainage holes
By following these steps, you can keep your house plants healthy and free from root rot.
When To Consult An Expert
Fixing root rot in house plants can be tricky. Sometimes, the damage is severe. In these cases, consulting an expert becomes essential. Experts can provide the right solutions and save your plants. Knowing when to seek help can make a big difference.
Signs Of Severe Damage
Some signs indicate severe root rot damage:
- Wilting Leaves: Even with proper watering, leaves look wilted.
- Discolored Roots: Roots are black, brown, or mushy.
- Foul Smell: Soil emits a bad odor.
- Slow Growth: Plant growth has stopped or slowed significantly.
These signs often mean the plant is in critical condition. Immediate expert consultation is crucial to prevent further damage.
Professional Treatment Options
Experts offer several treatment options for severe root rot:
- Root Pruning: Removing infected roots can save the plant.
- Re-potting: Moving the plant to fresh soil helps recovery.
- Fungicide Treatment: Applying fungicide can kill harmful fungi.
- Soil Testing: Experts test soil to ensure it’s healthy.
Each treatment requires specific tools and knowledge. Experts ensure these treatments are applied correctly for the best results.
| Sign | Action |
|---|---|
| Wilting Leaves | Check root health |
| Discolored Roots | Prune affected roots |
| Foul Smell | Replace the soil |
| Slow Growth | Consult an expert |
Consulting an expert at the right time can save your plant. Experts have the knowledge and tools needed for effective treatment. Your house plants will thank you for the proper care.
:strip_icc()/how-to-water-houseplants-5651236-03-474c2b7e186743c4a1e32050e4212712.jpg)
Credit: www.bhg.com
Frequently Asked Questions
How To Fix Root Rot In Indoor Plants?
Remove affected roots and repot in fresh, well-draining soil. Trim damaged leaves and water less frequently. Ensure proper light.
Can Plants Recover From Root Rot?
Yes, plants can recover from root rot. Remove affected roots, improve drainage, and reduce watering. Use fungicide if needed.
How Do You Fix Root Rot Without Replanting?
Trim affected roots and remove decayed parts. Improve drainage and reduce watering. Apply fungicide to prevent further infection.
How To Tell If A Plant Has Root Rot?
Check for yellowing or wilting leaves. Inspect roots for a brown, mushy texture. Smell for a foul odor.
Conclusion
Reviving house plants from root rot can be challenging but rewarding. Follow the steps to ensure healthy growth. Regular checks and proper care prevent future issues. With patience and attention, your plants will thrive. Happy gardening and enjoy your lush, green indoor oasis!

My mission is to help you bring the beauty of nature indoors with expert advice, detailed plant care guides, and creative design ideas.

Leave a Reply